
Membership and Unified Packages Overview
Guide to the New Packages and Membership Features in SPRY
Manage packages and memberships for patients more efficiently with SPRY revamped Packages flow. The new features let you create, assign, and track packages and memberships in a centralized, intuitive manner. Here’s how it all works.
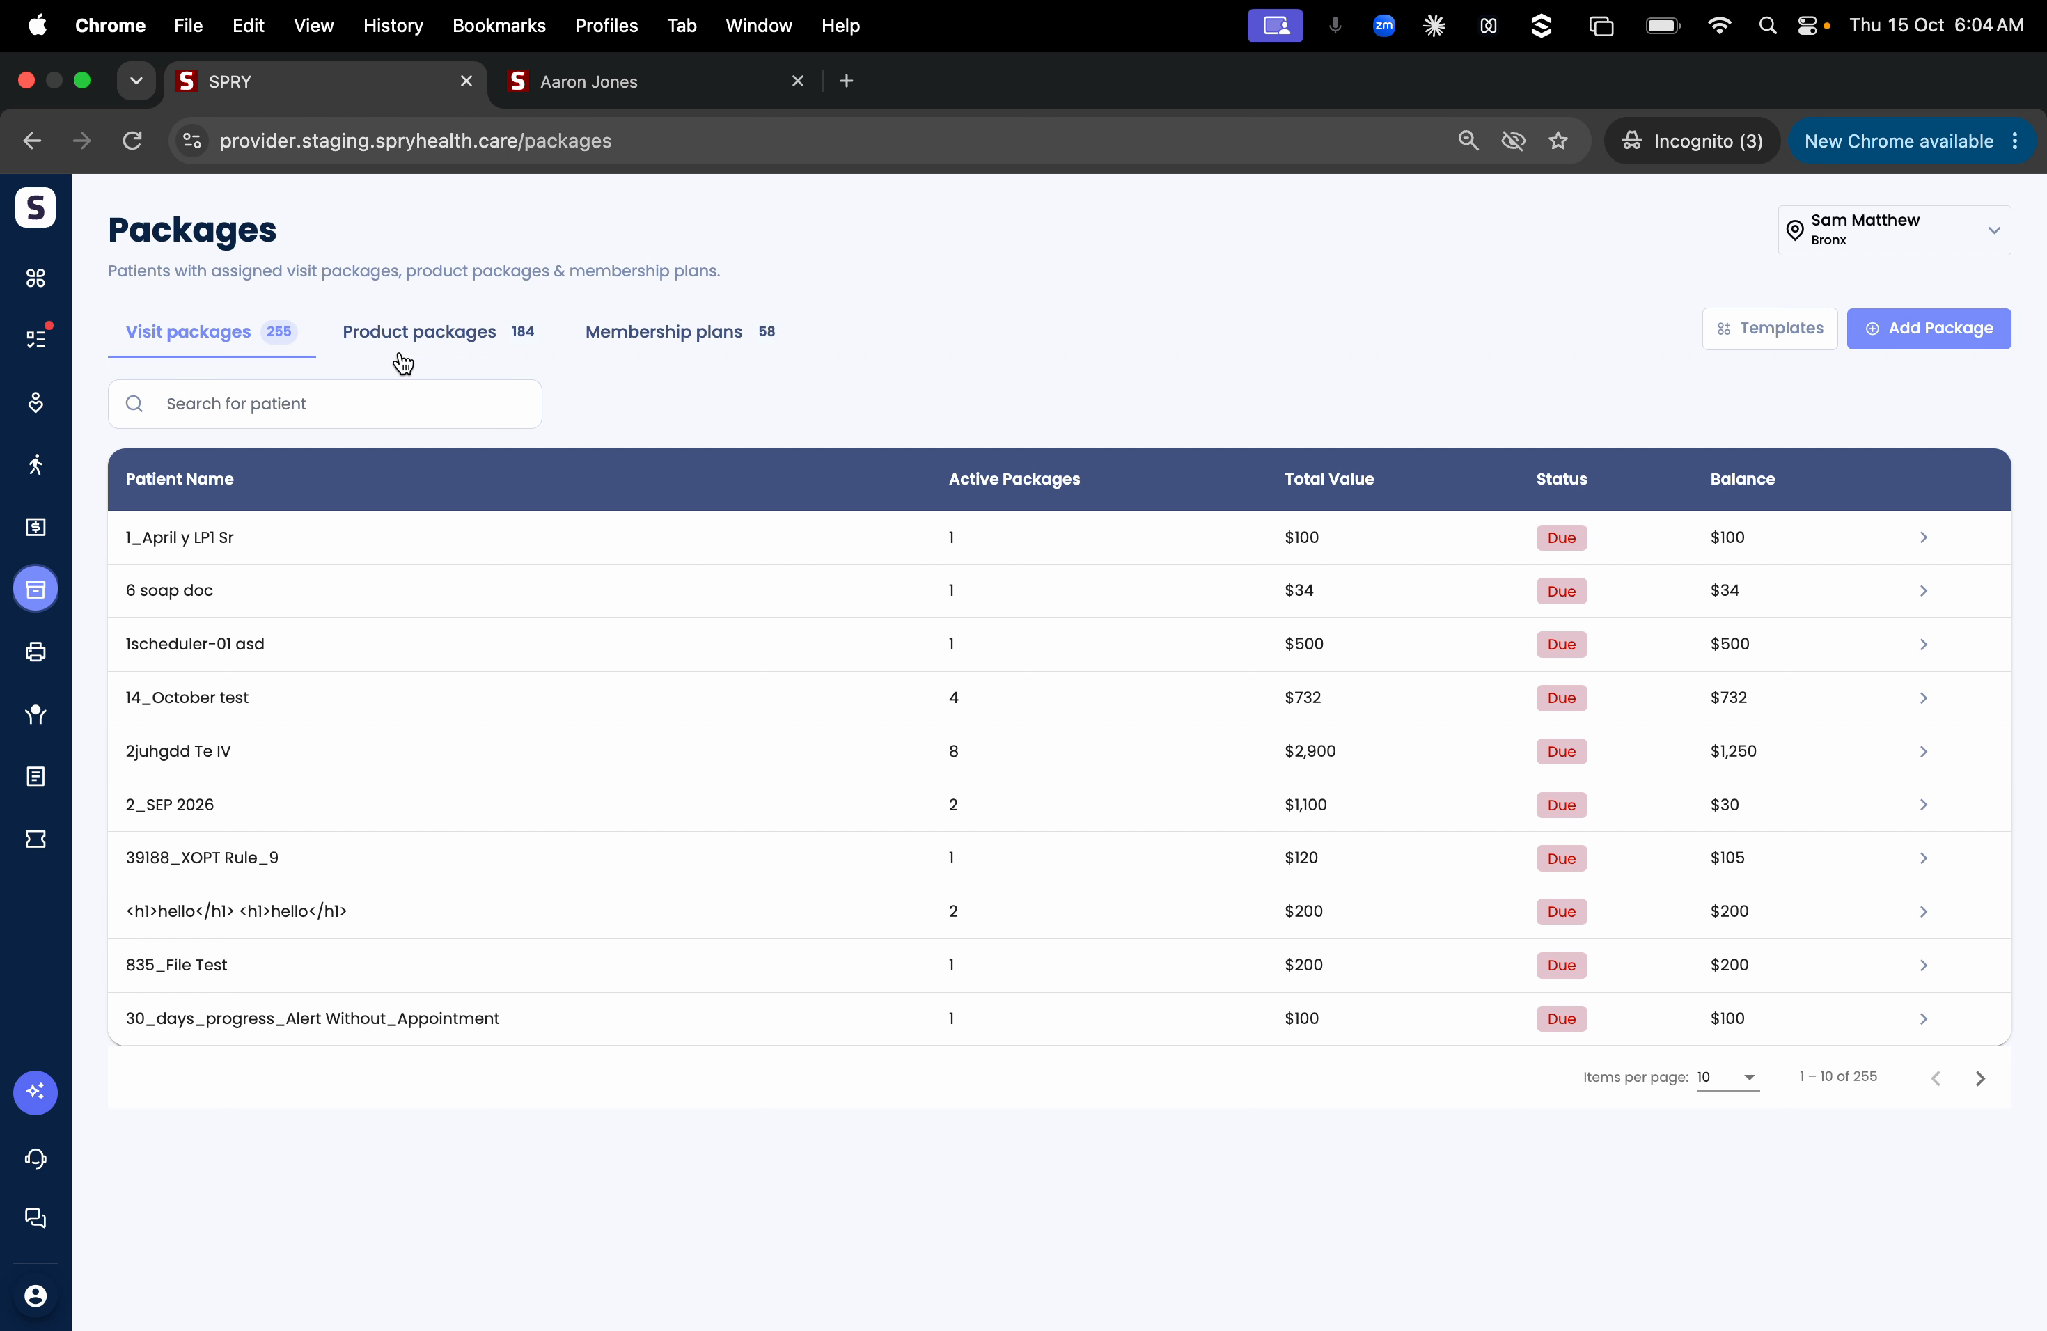
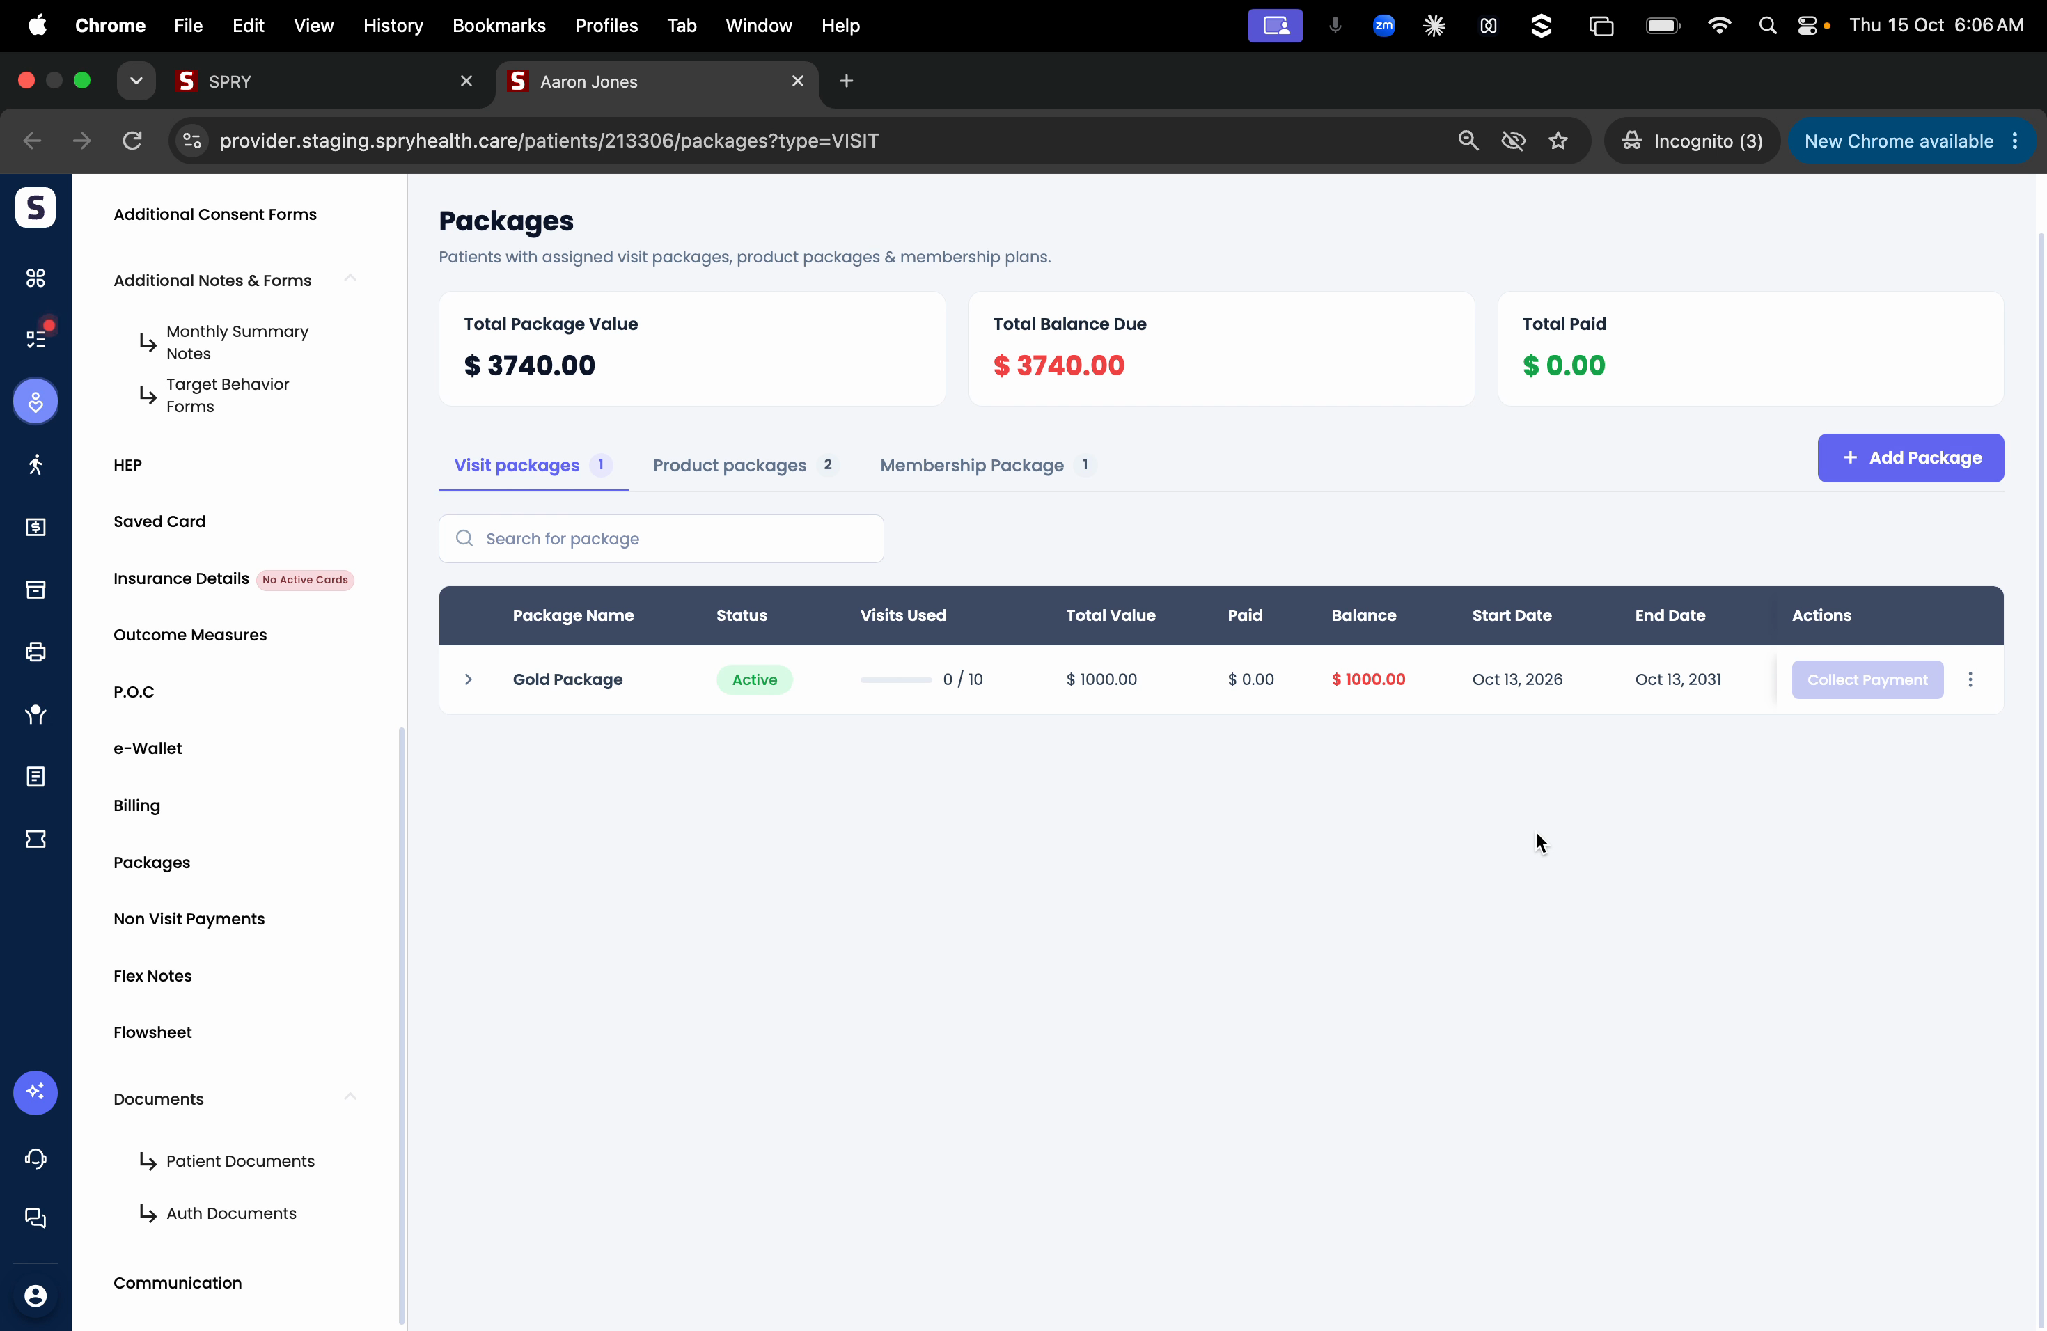
Step 1: Navigate to the Packages section. The screen is split into three tabs: Visit Packages, Product Packages, and Membership Packages—each showing packages assigned to the patient.
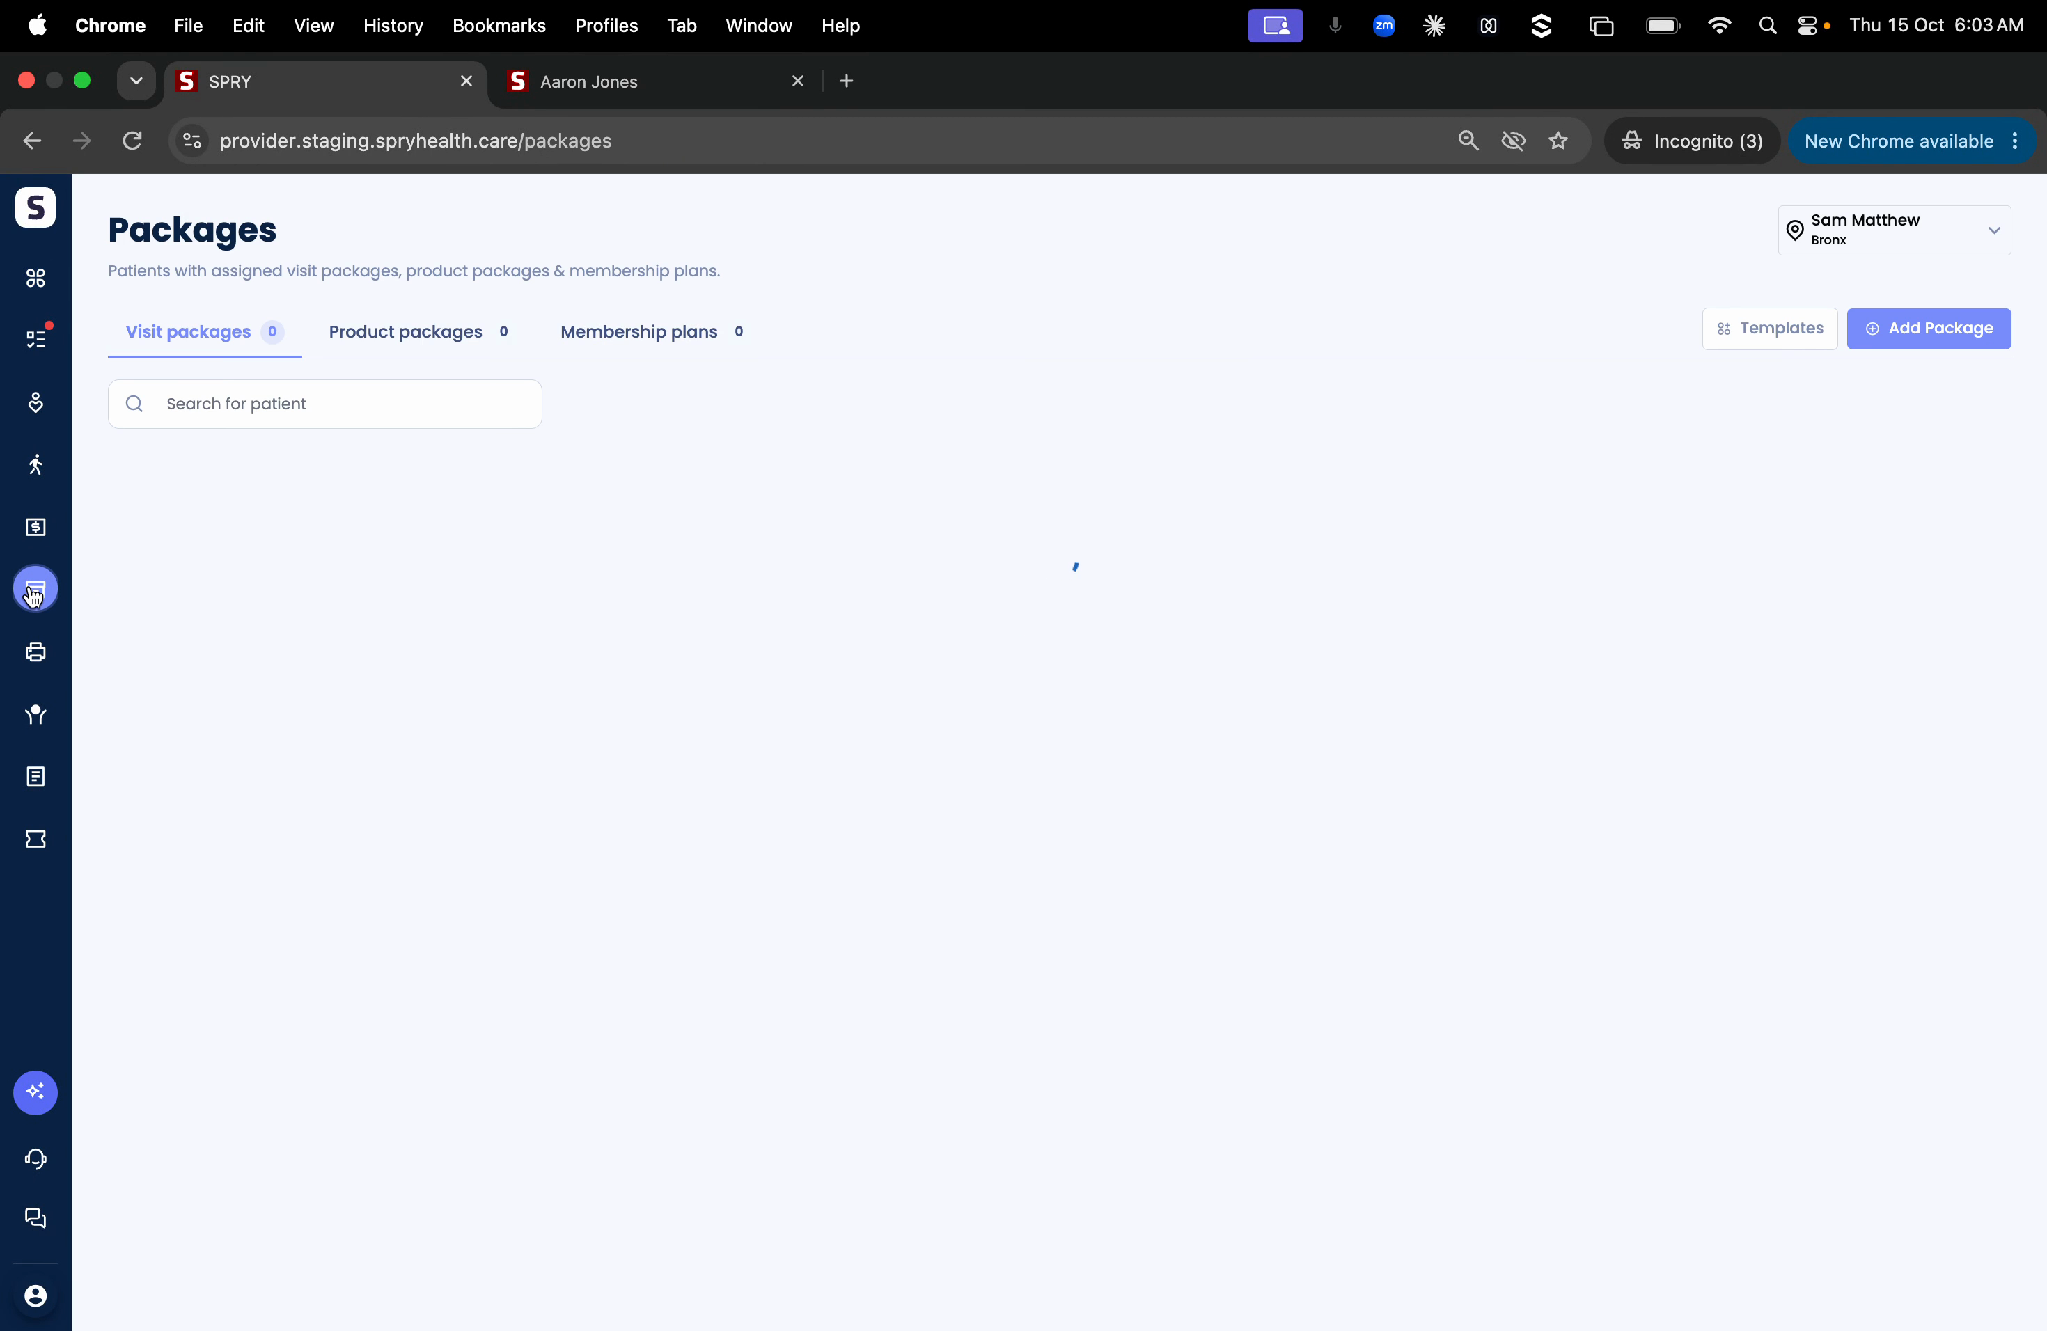
Step 2: Switch between the tabs to view different assigned package types for each patient.
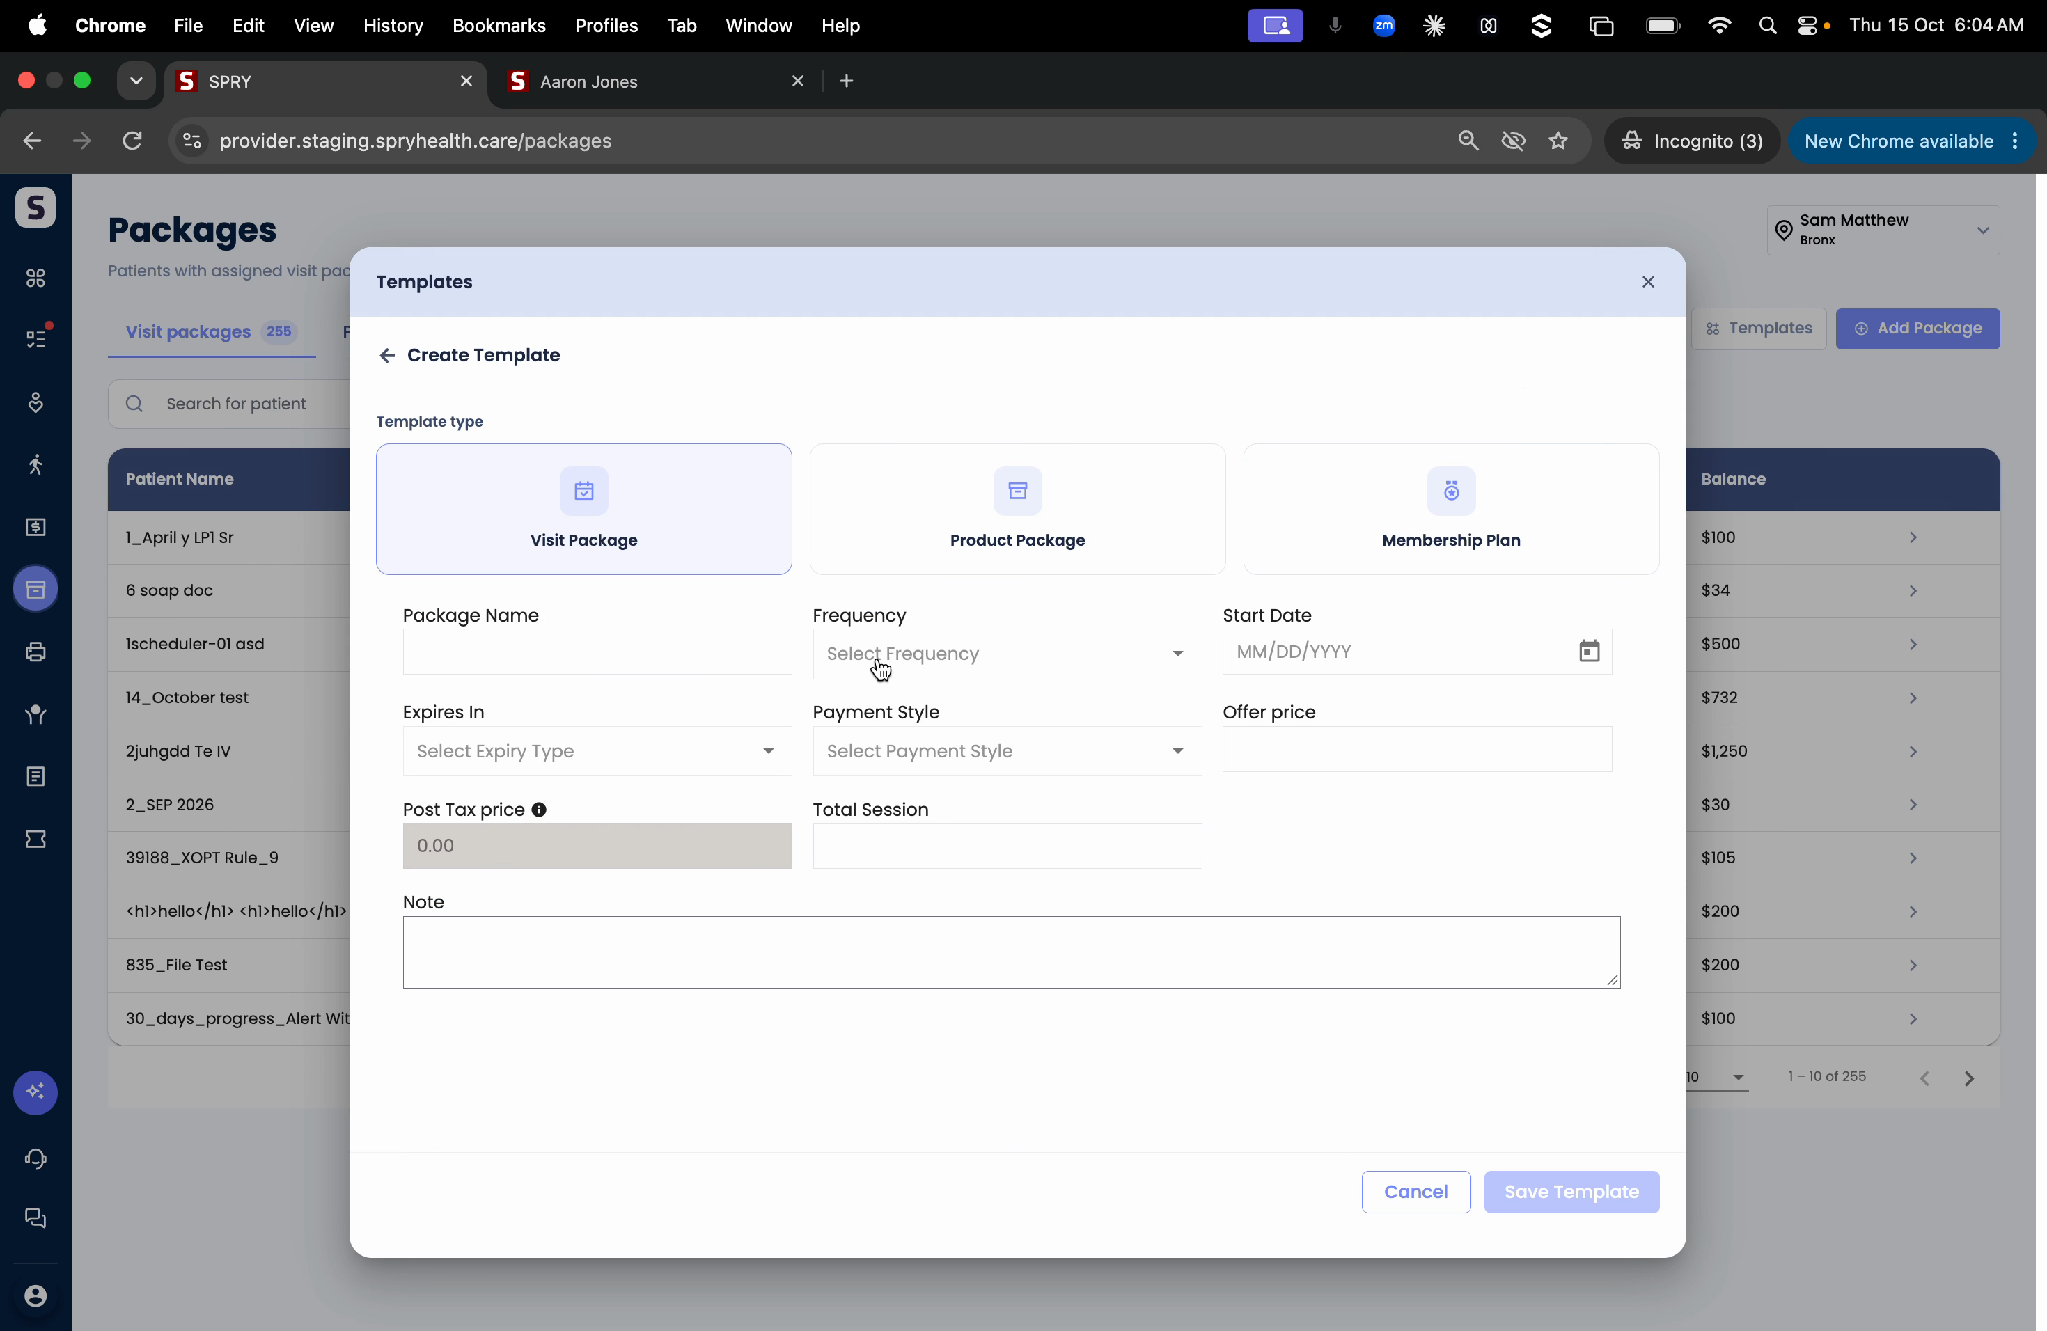
Step 3: Use Create New Template to build reusable templates for different kinds of packages. Save templates so you can quickly assign them later.
Step 4: To add a package to a patient, click Add Package. Choose from your saved templates, or select Create Custom Package to make a custom one.
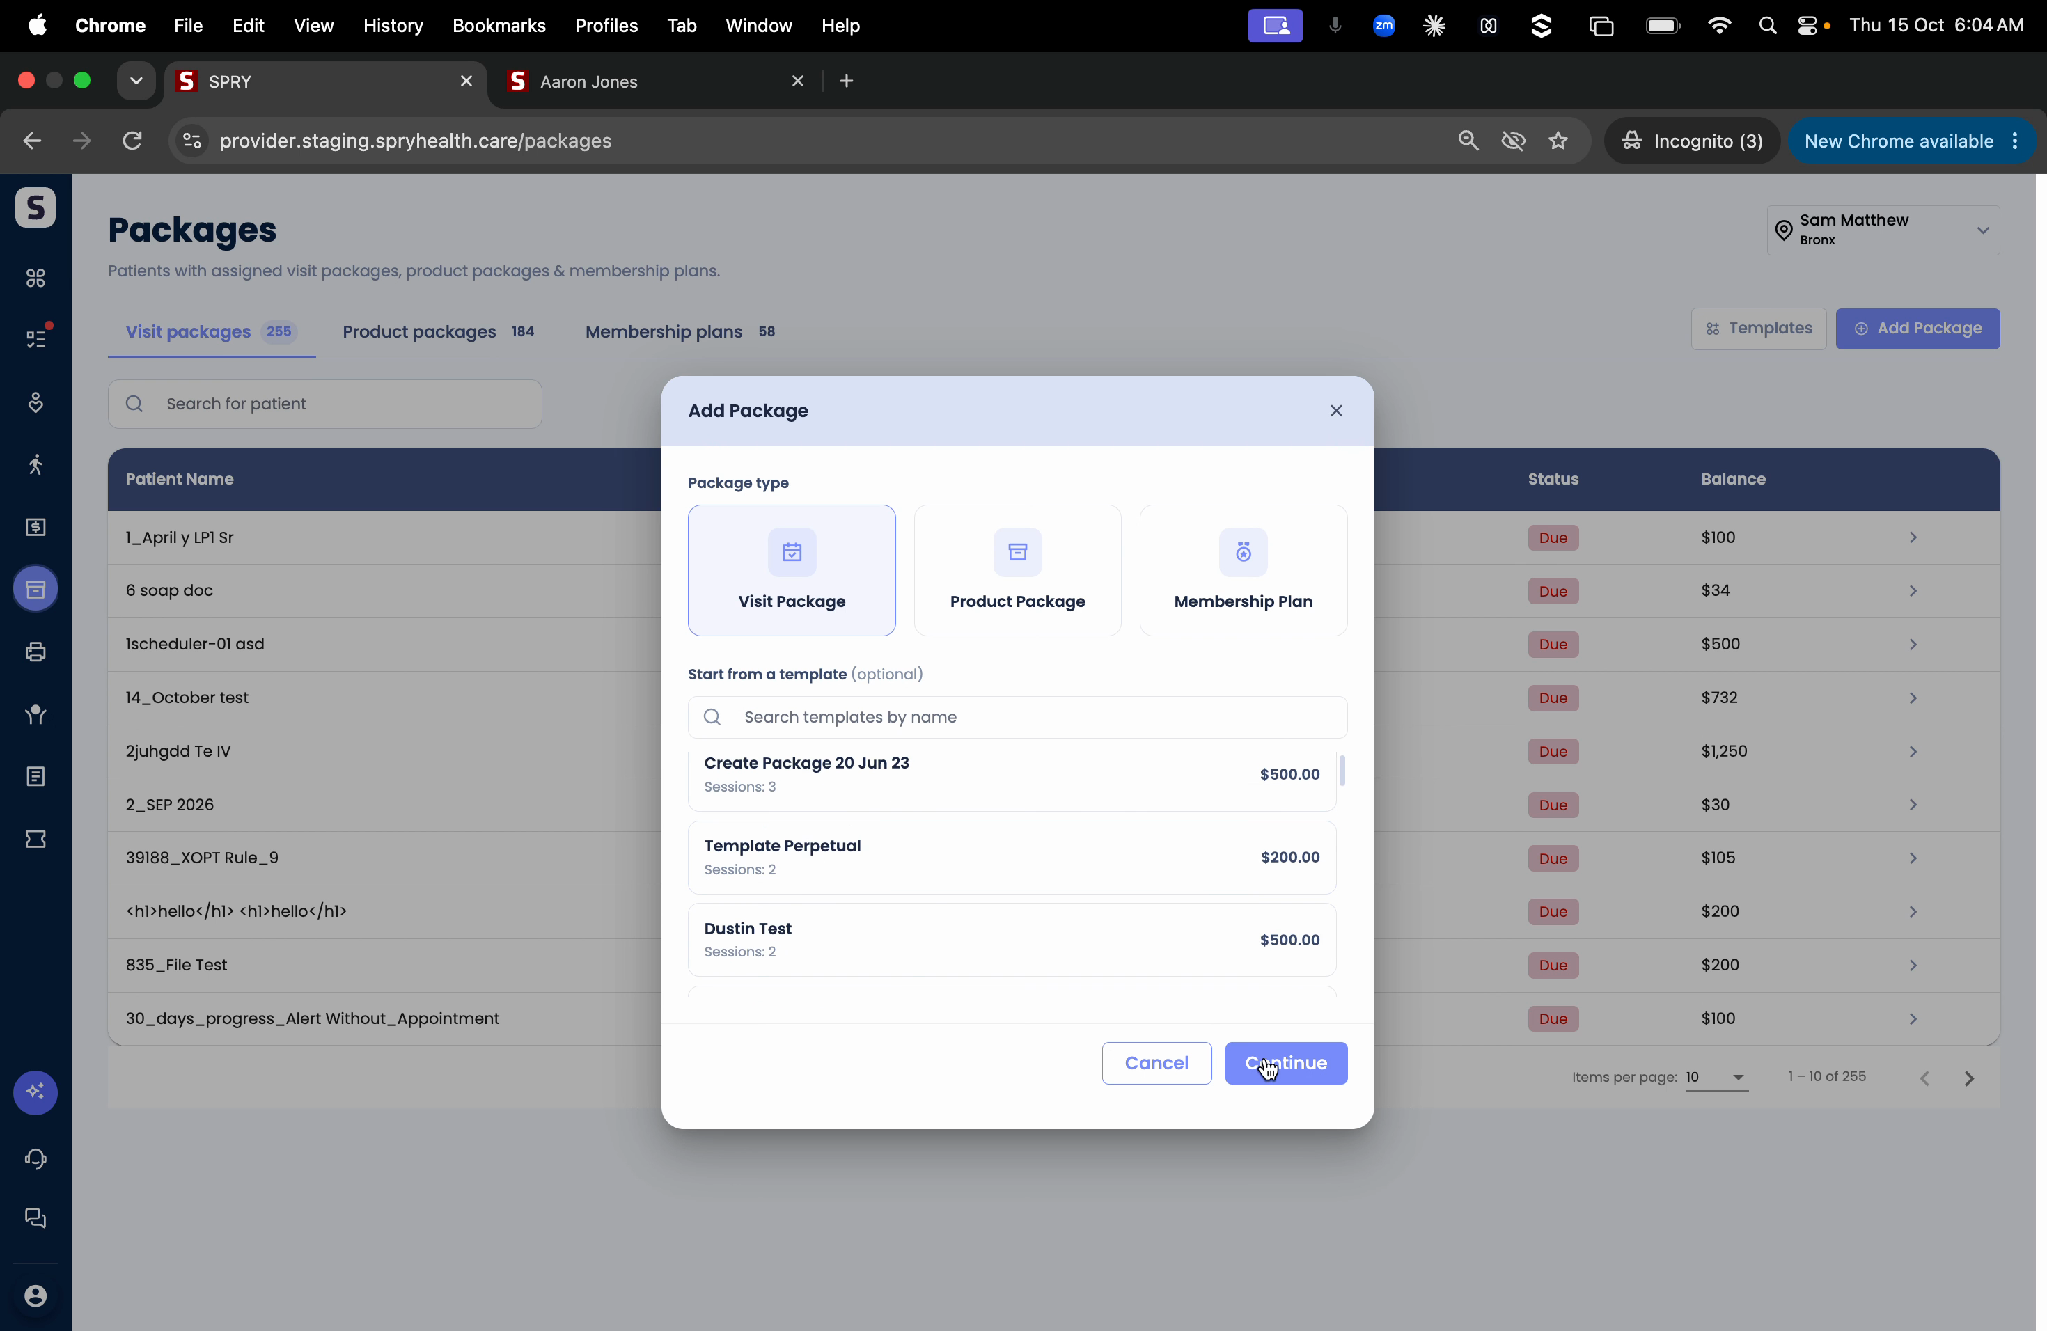
Step 5: Assign either a product package or a membership plan to the patient right from the same screen.
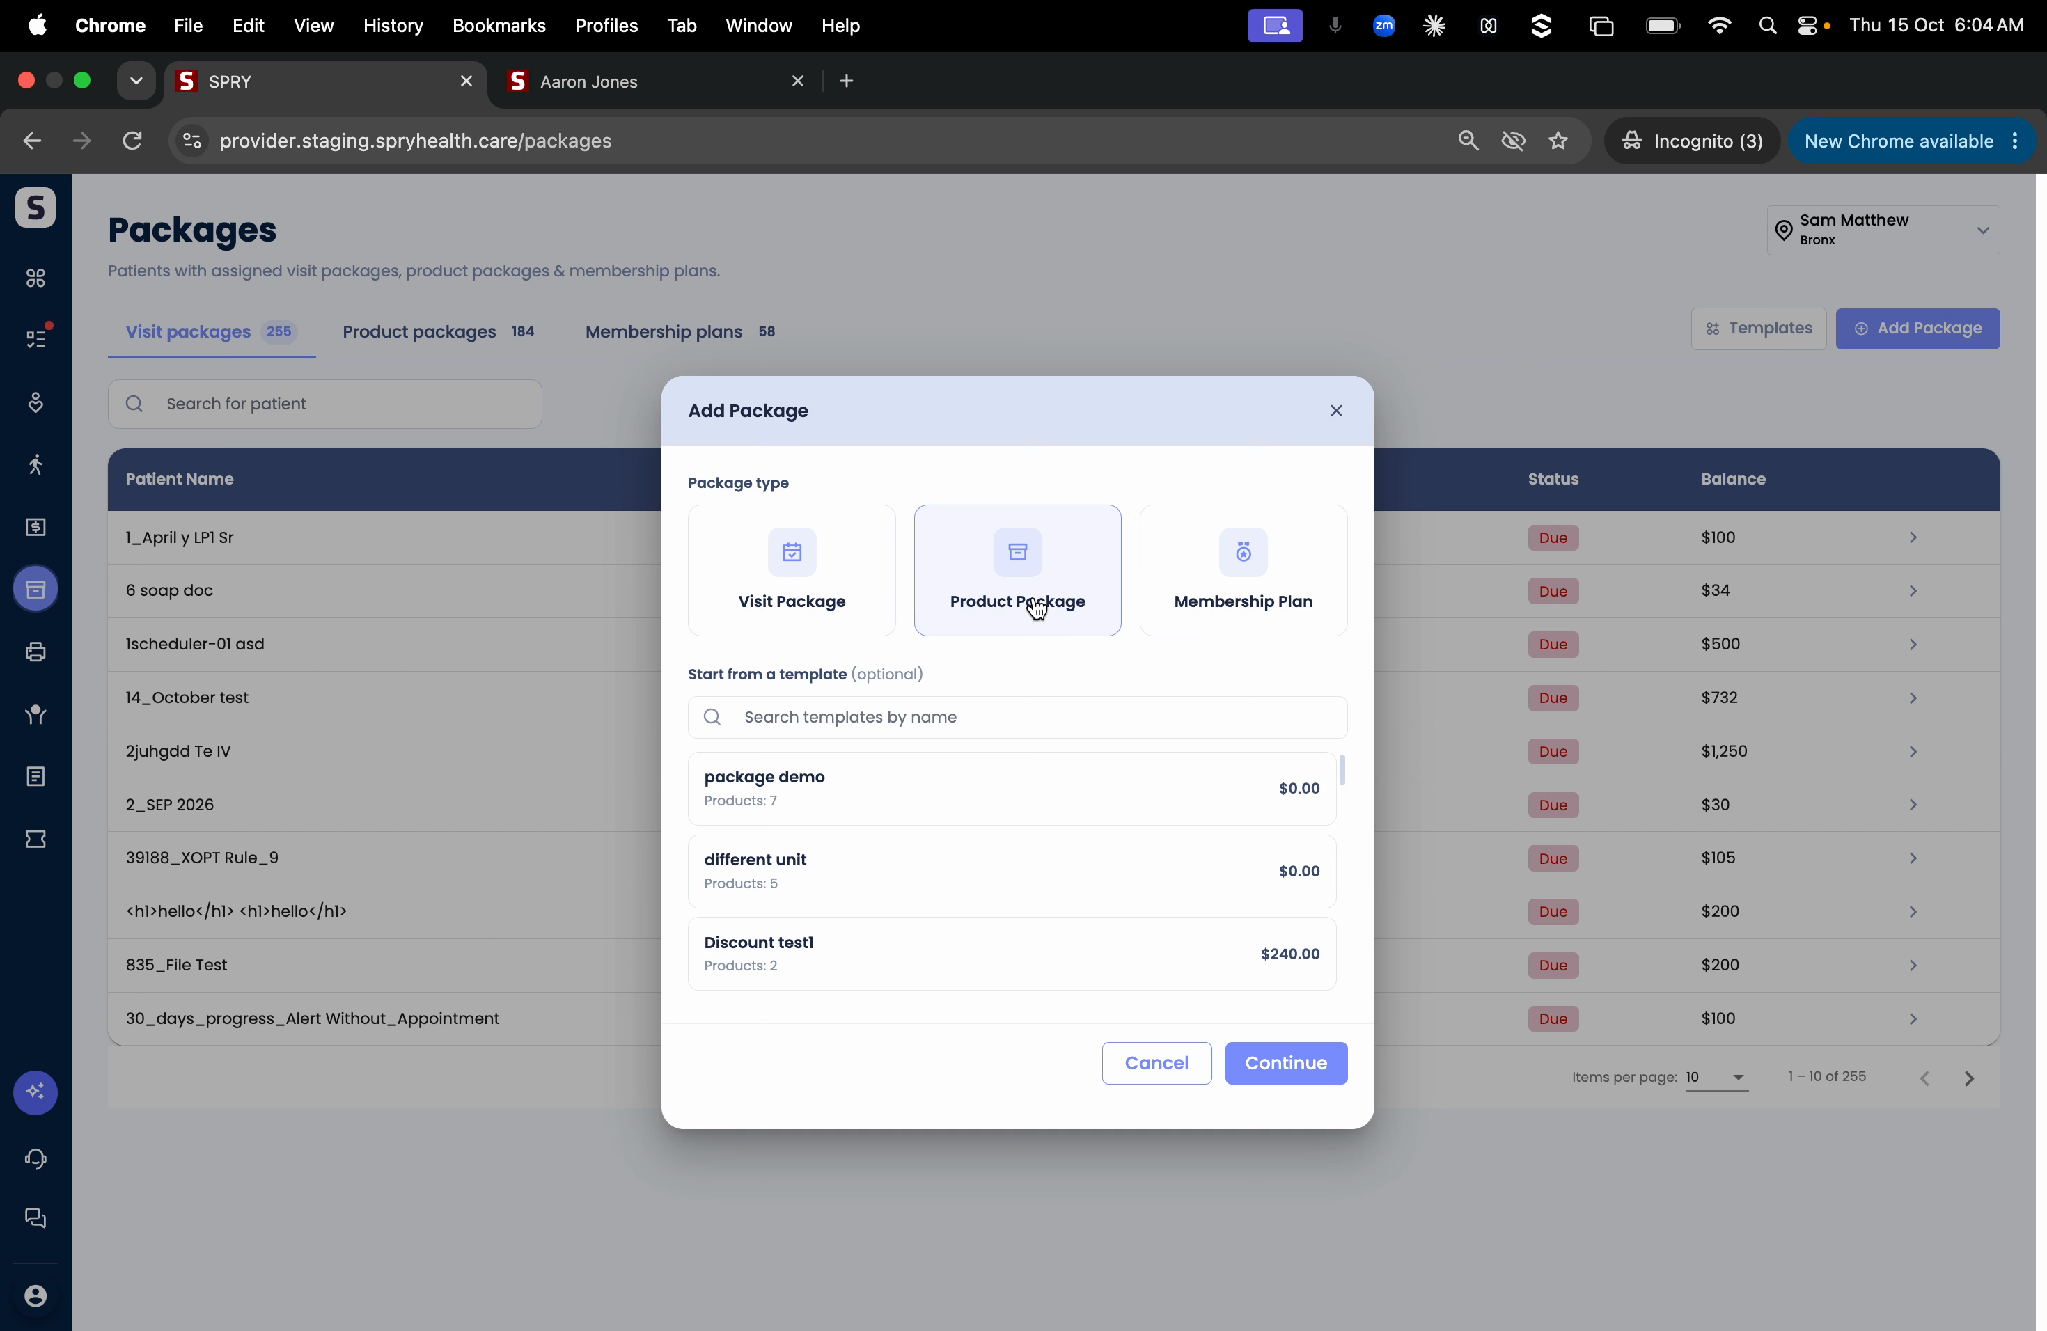
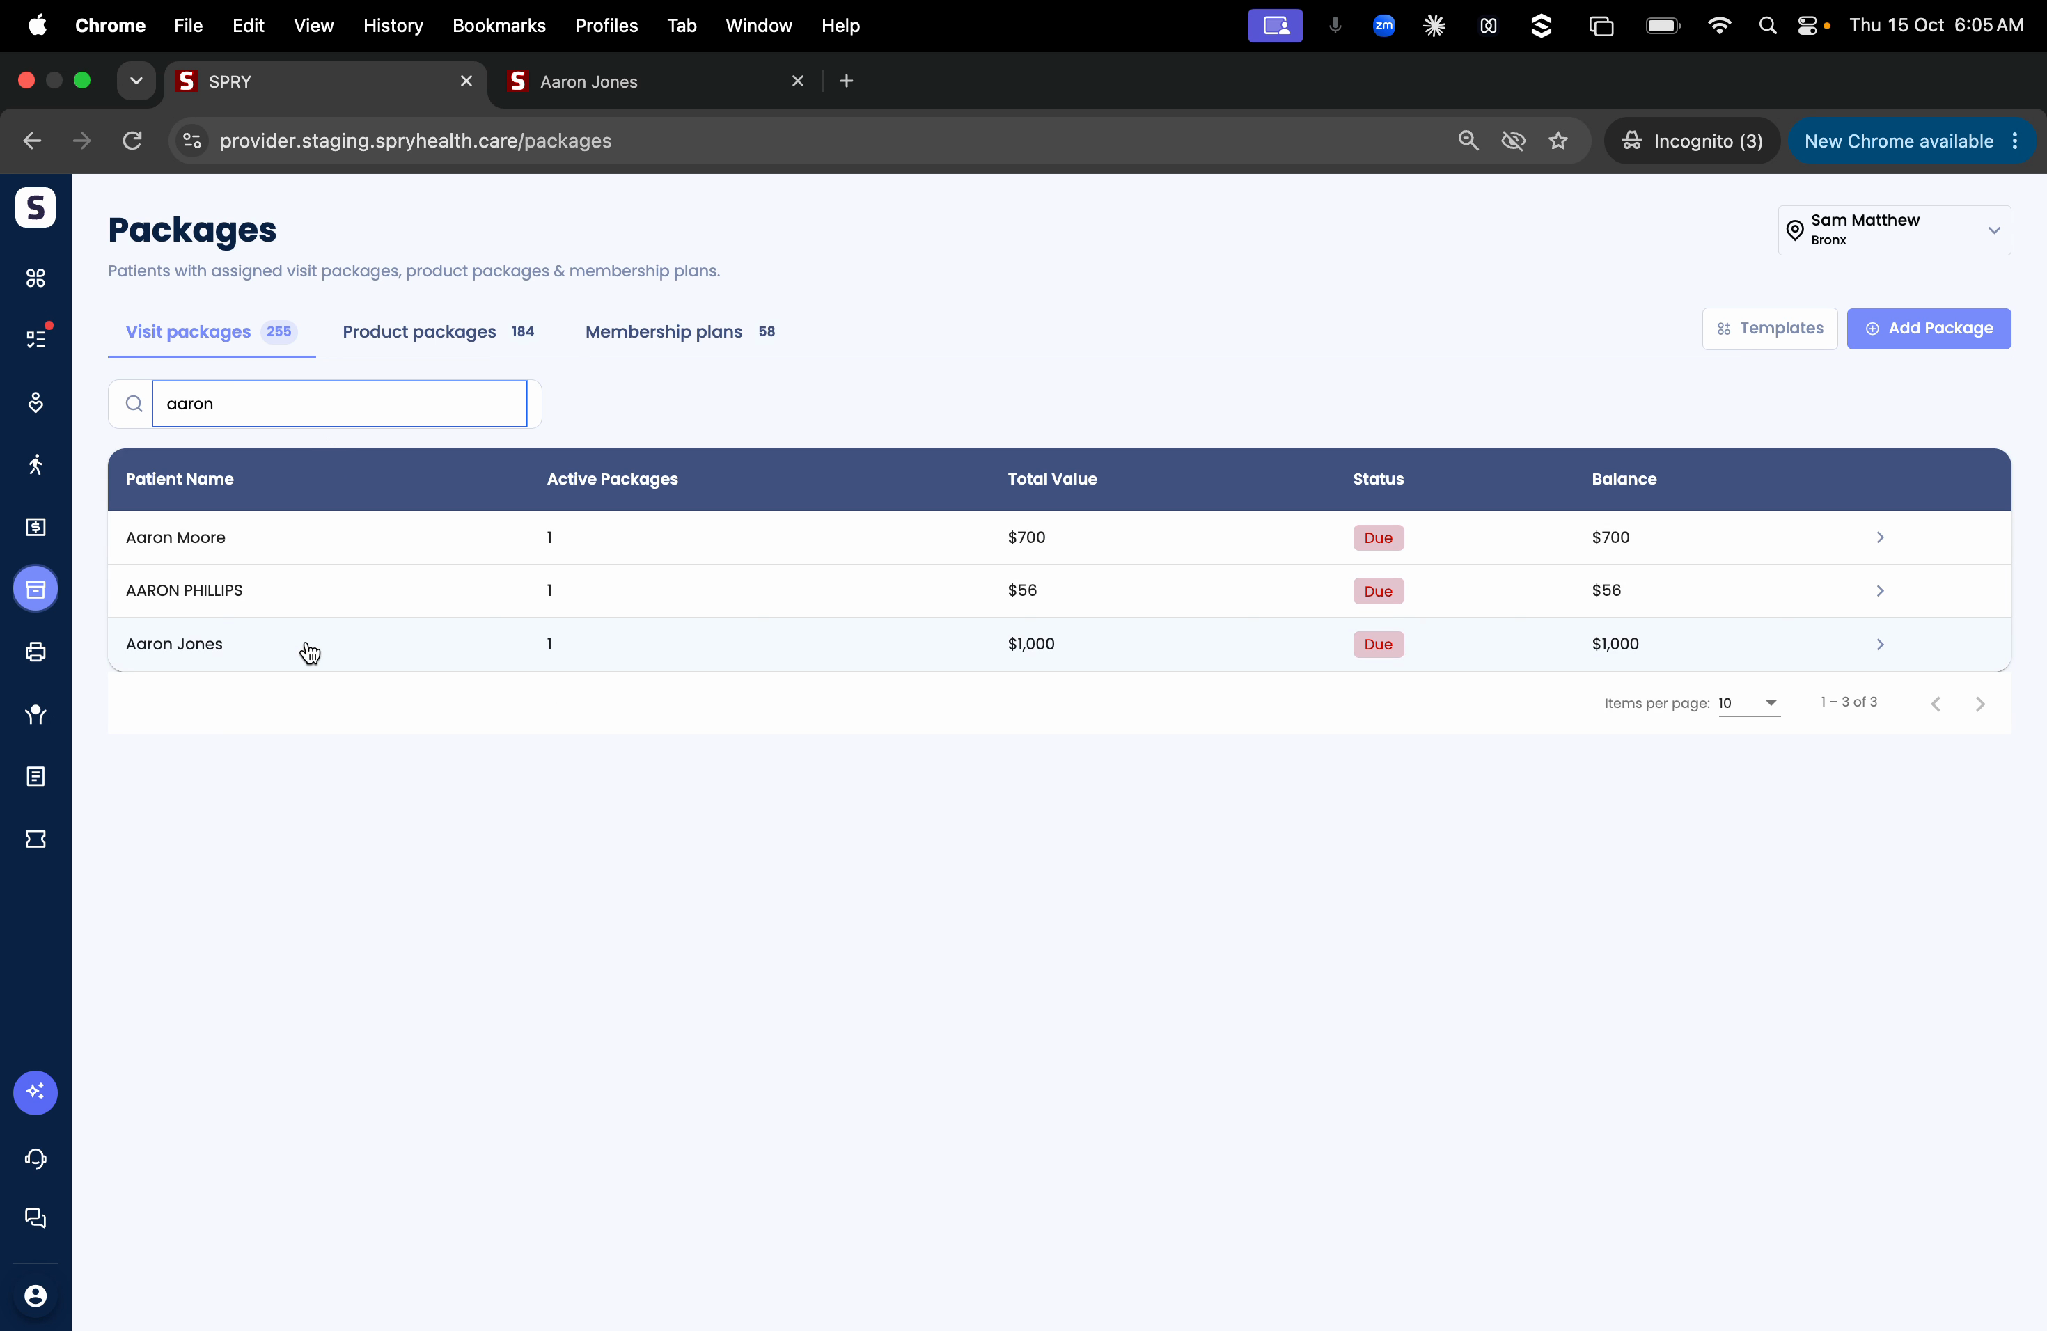
Step 6: Quickly find a patient using the Search bar. Enter the patient’s name and select them to go straight to their timeline.
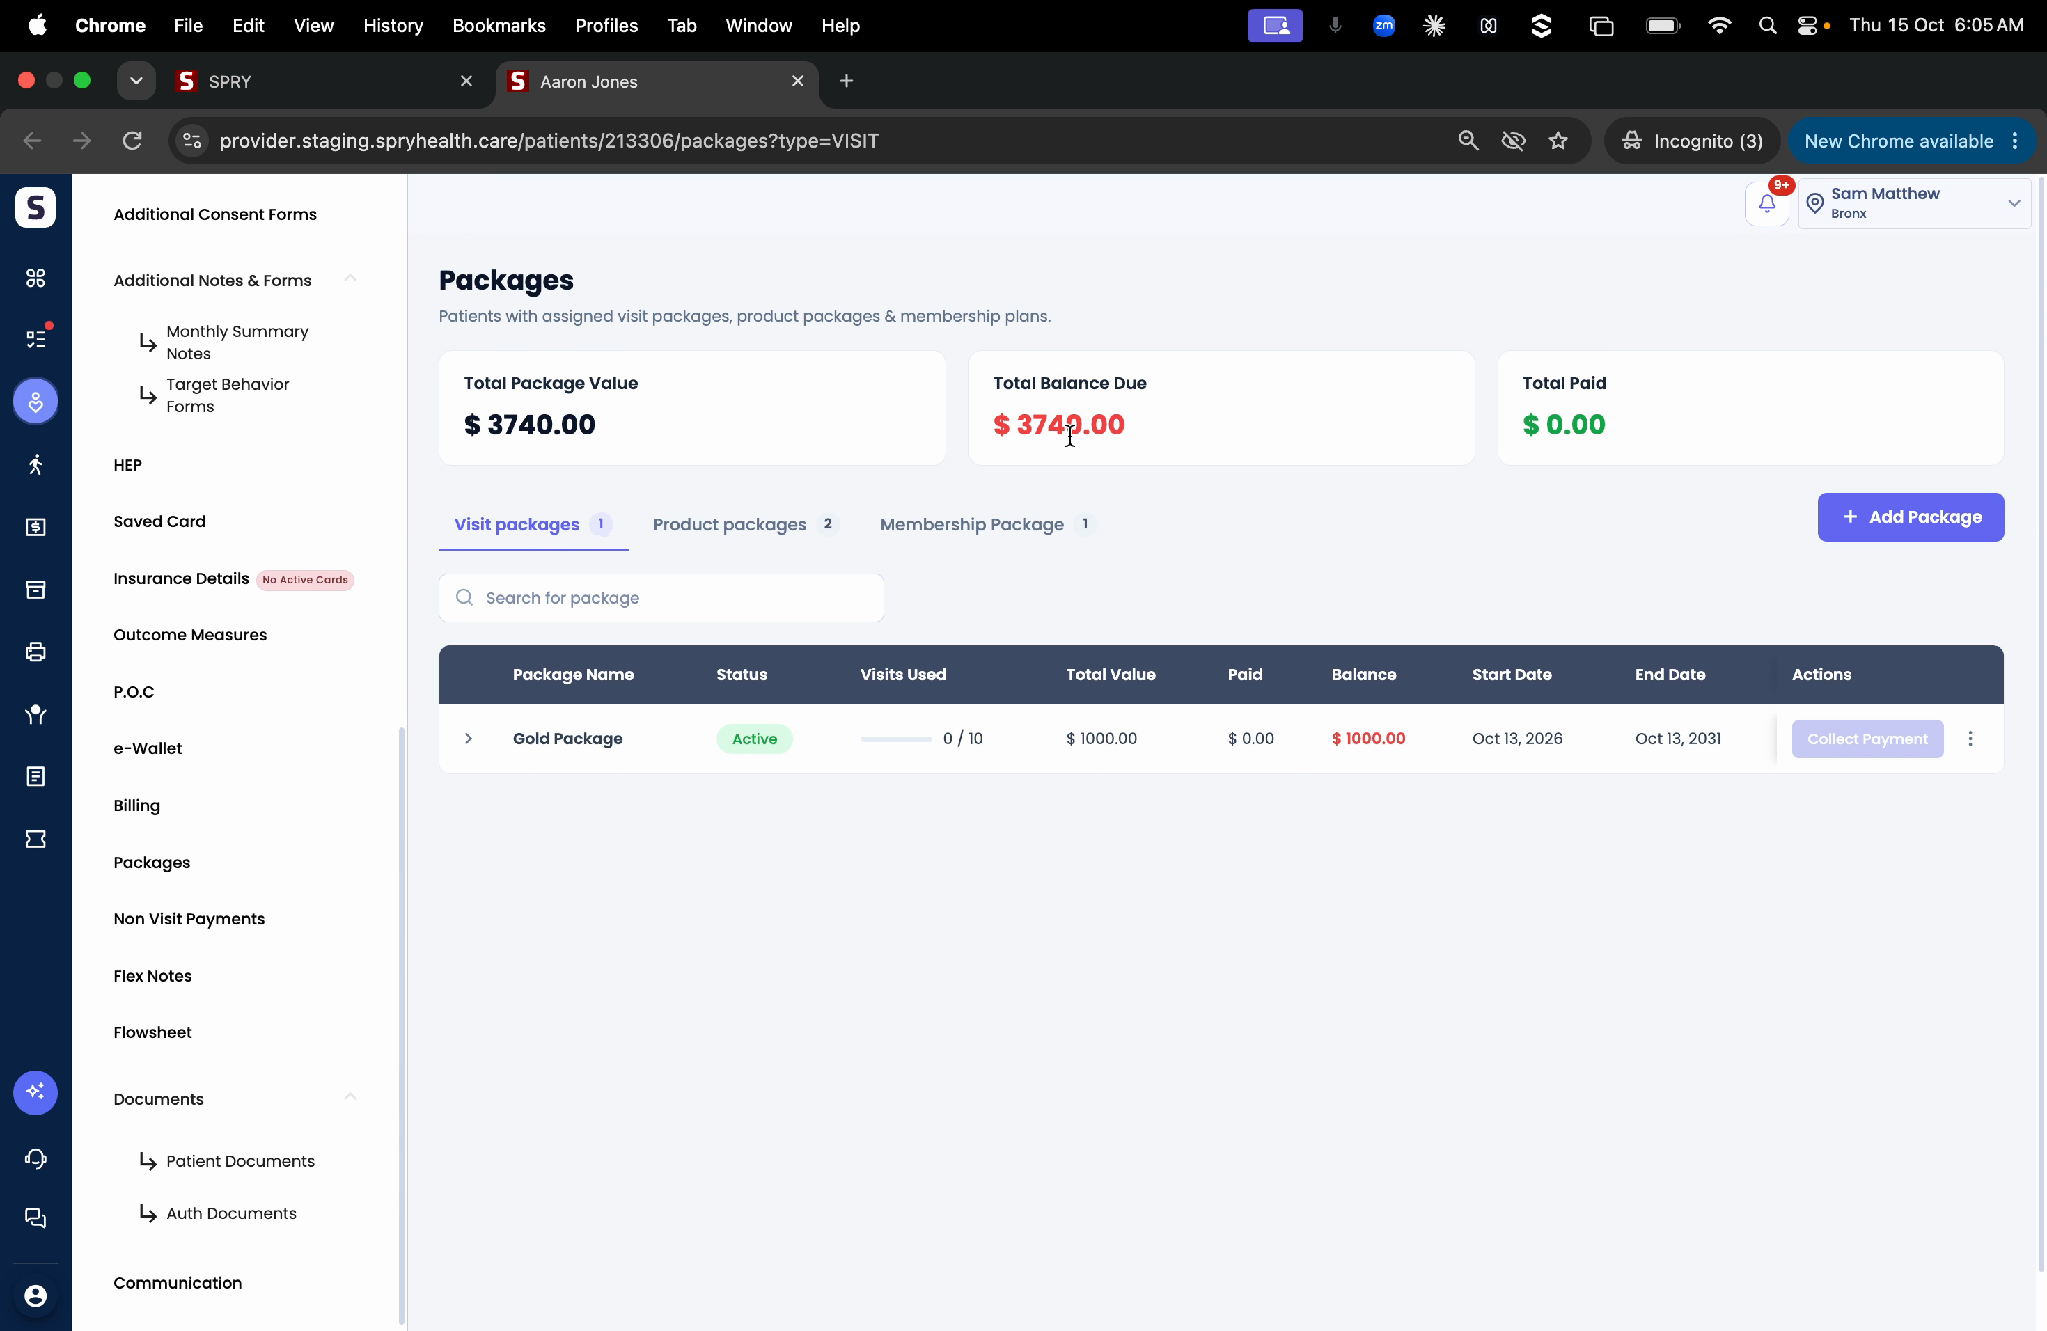
Step 7: In the patient’s timeline, click the Packages tab. See all assigned packages, total package value, outstanding balance, and paid amount. You can also create a new package for the patient from here.
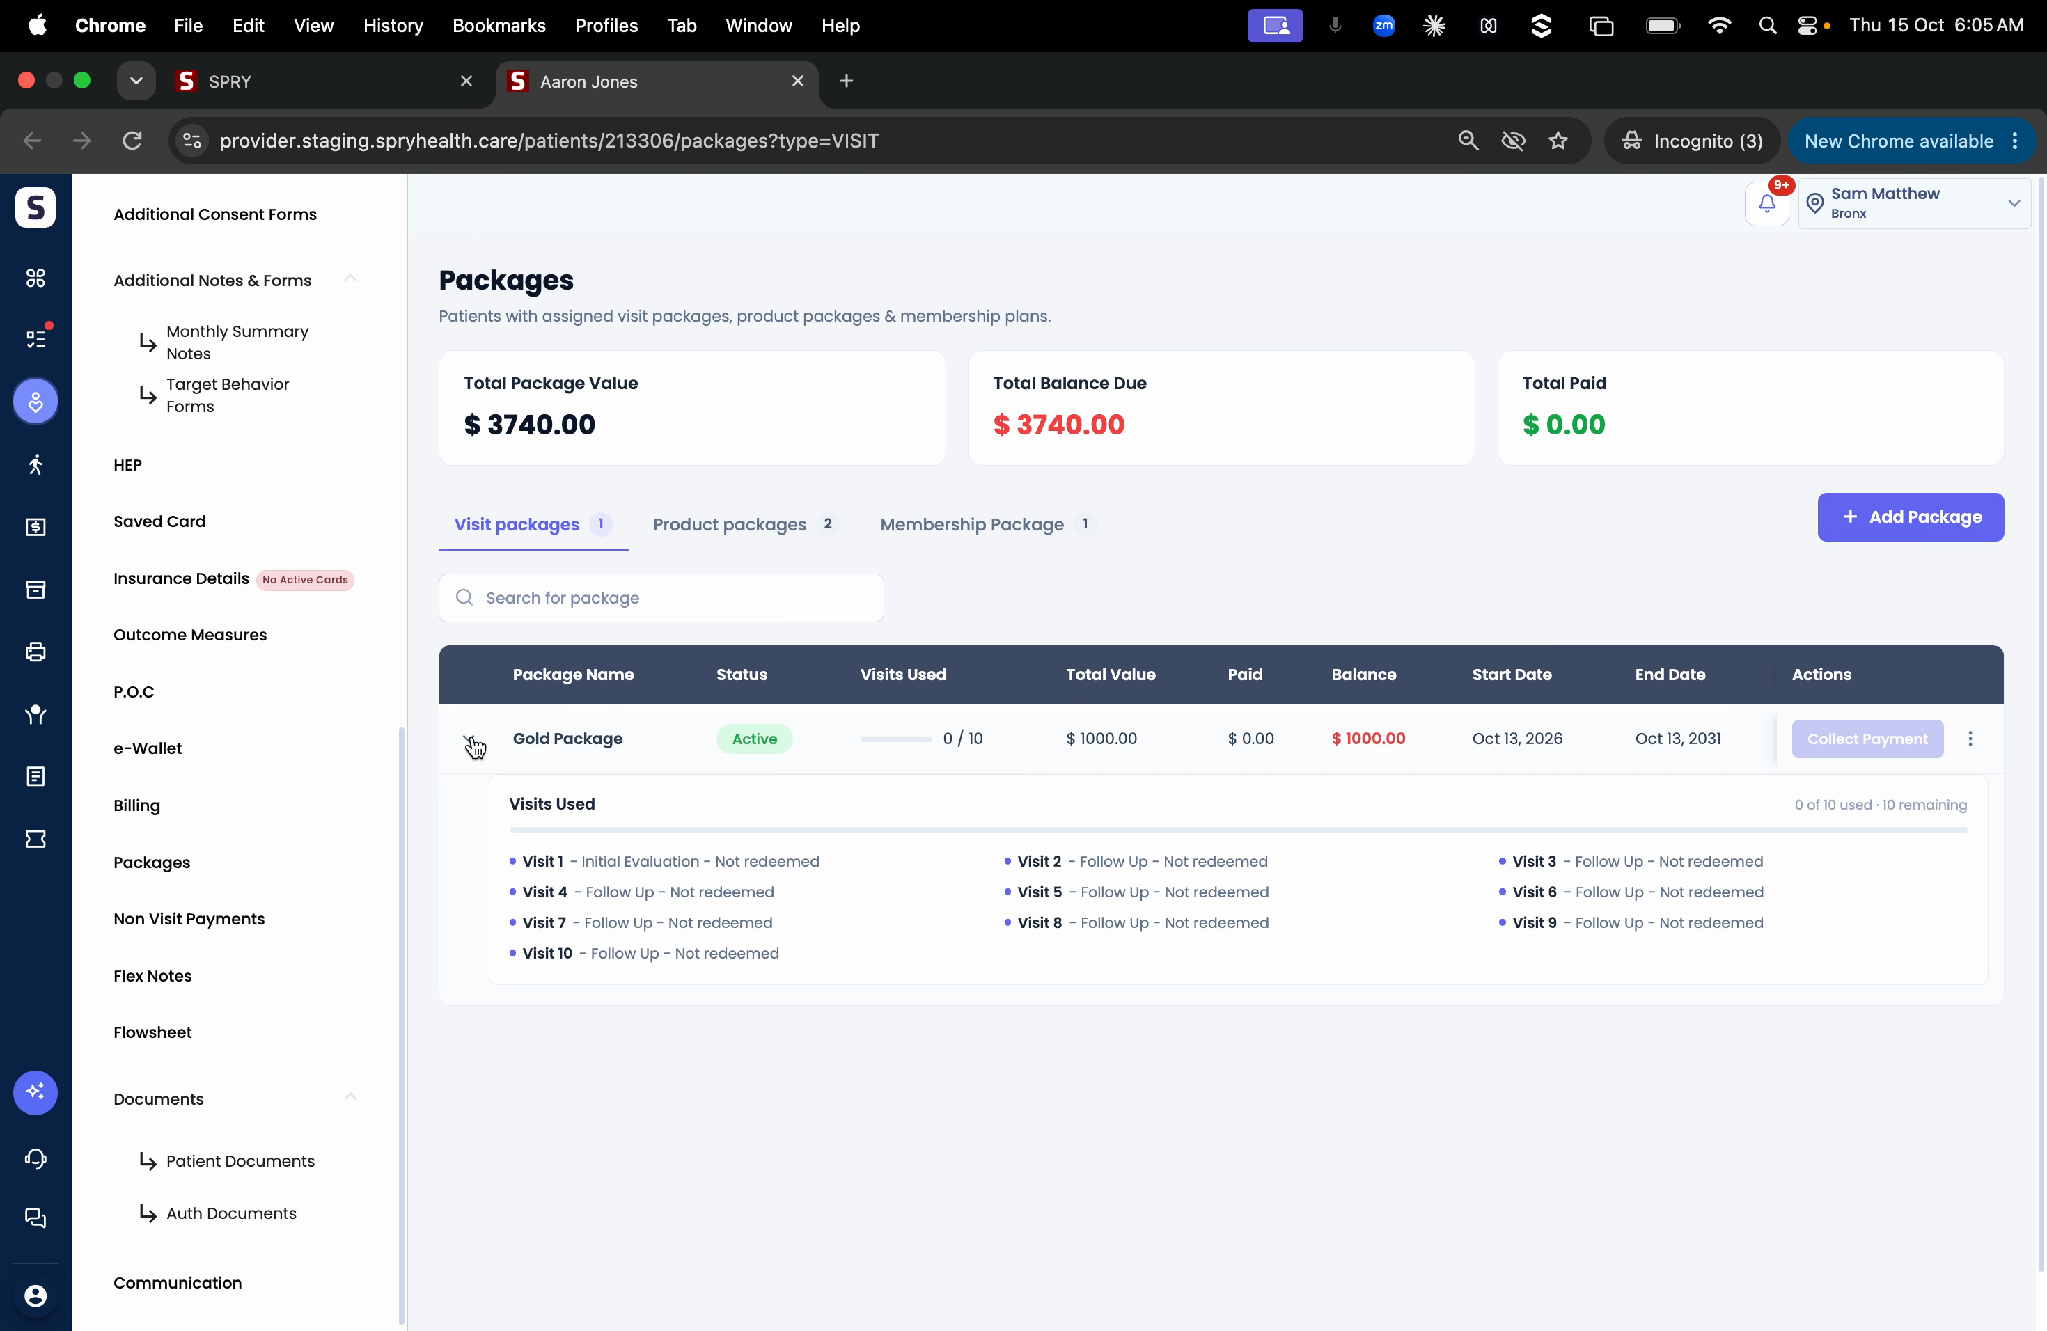
Step 8: Click on a specific package for details—see which visits are assigned, their completion status, and financial overviews for each package.
Step 9: For membership packages, view installment breakdowns (like monthly or quarterly payments), total duration, and renewal status. Collect payments or renew memberships directly from this screen.
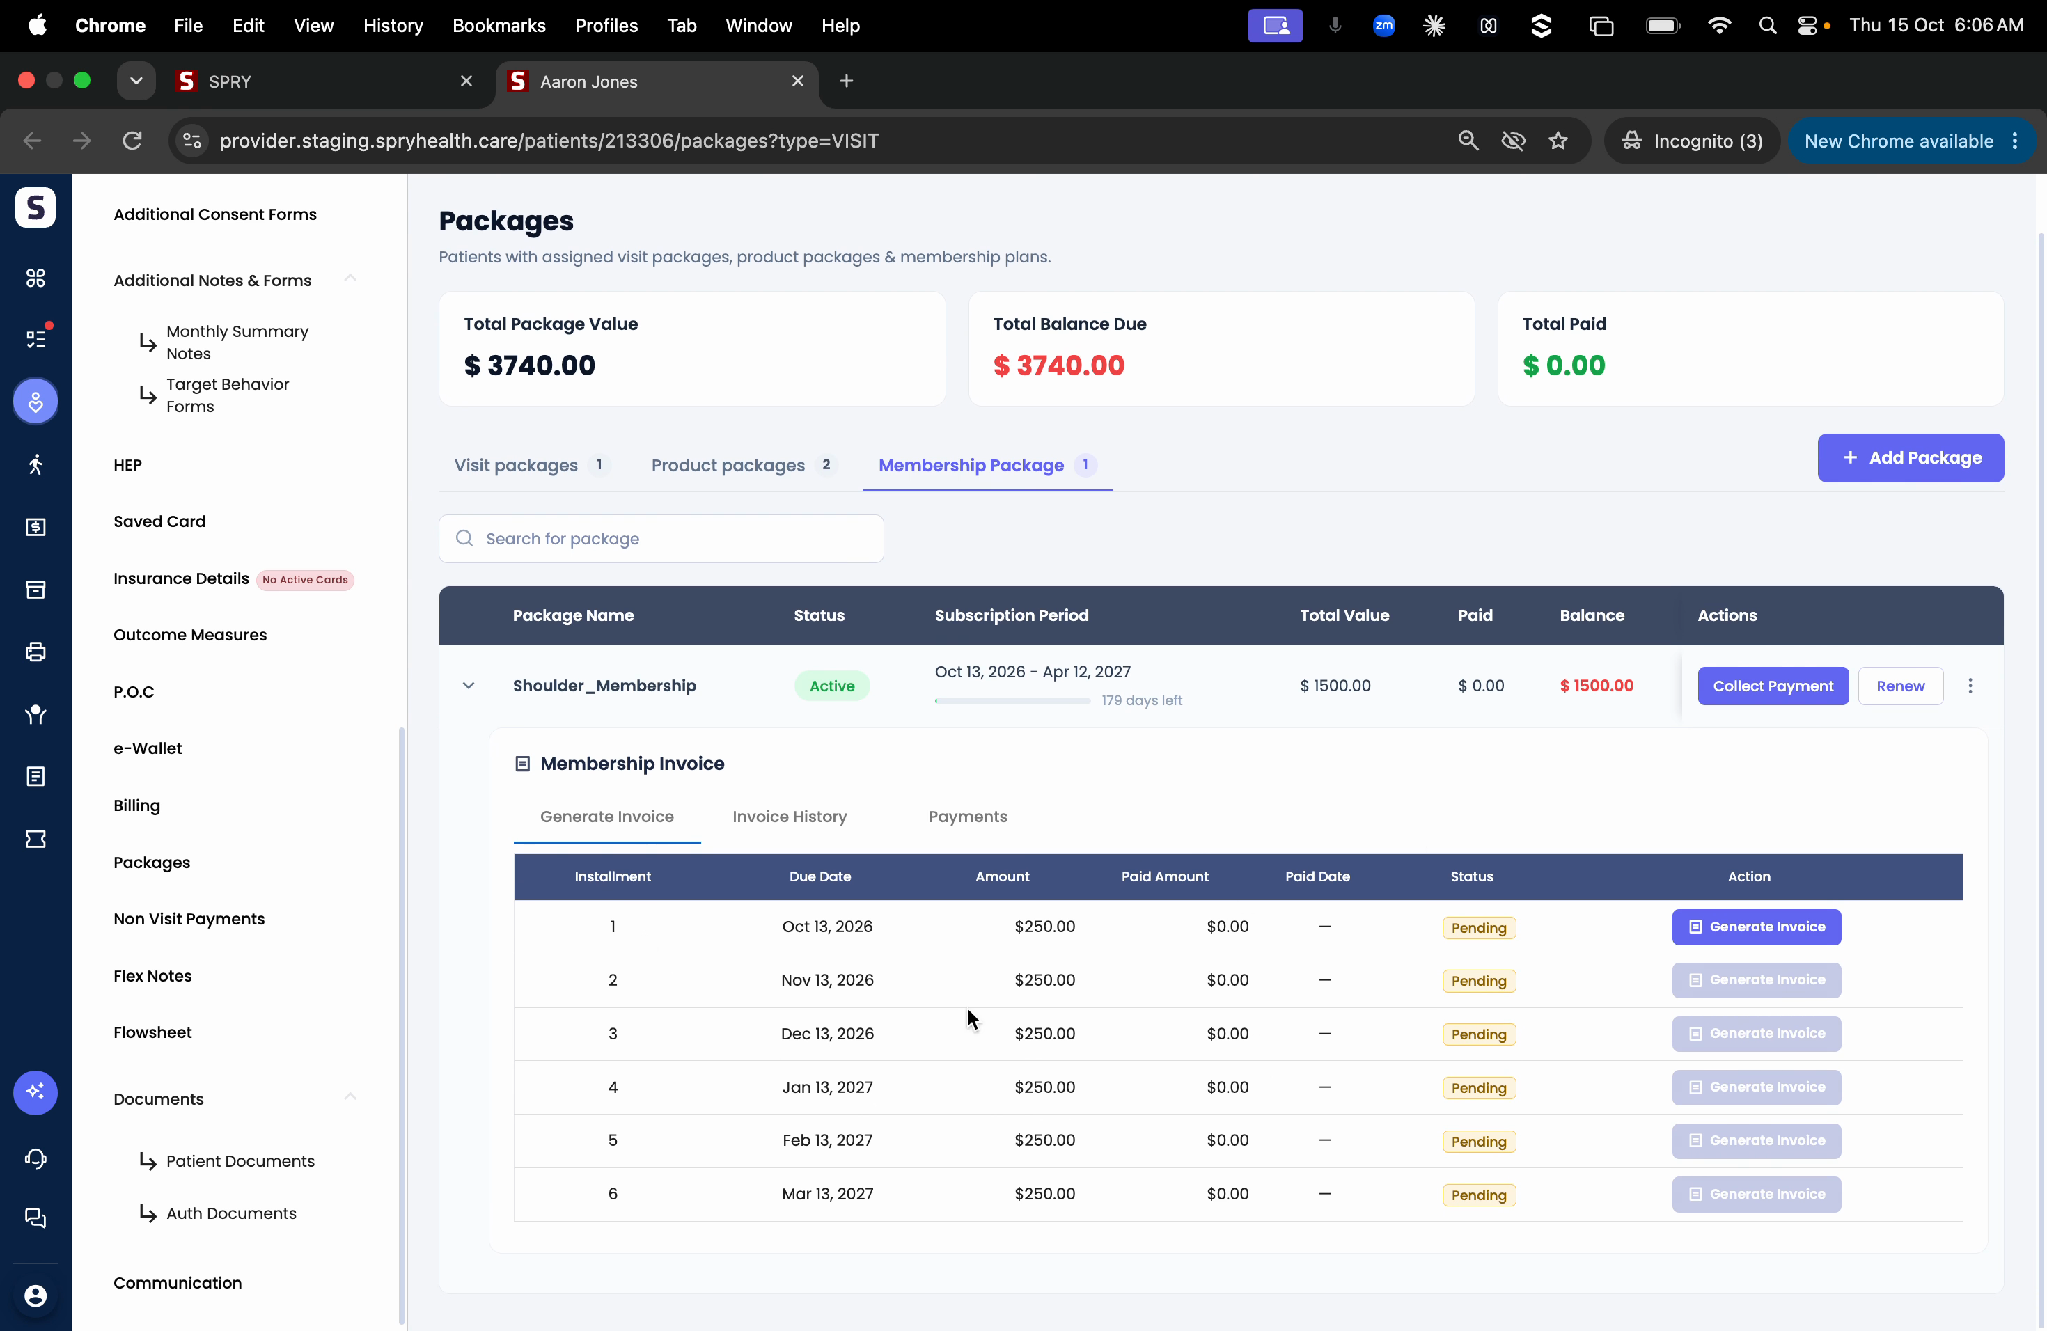
Step 10: Collect payments for packages (visit or product) directly from the Packages screen, removing the need to go to the billing dashboard or appointment card.
Creating a New Membership Package
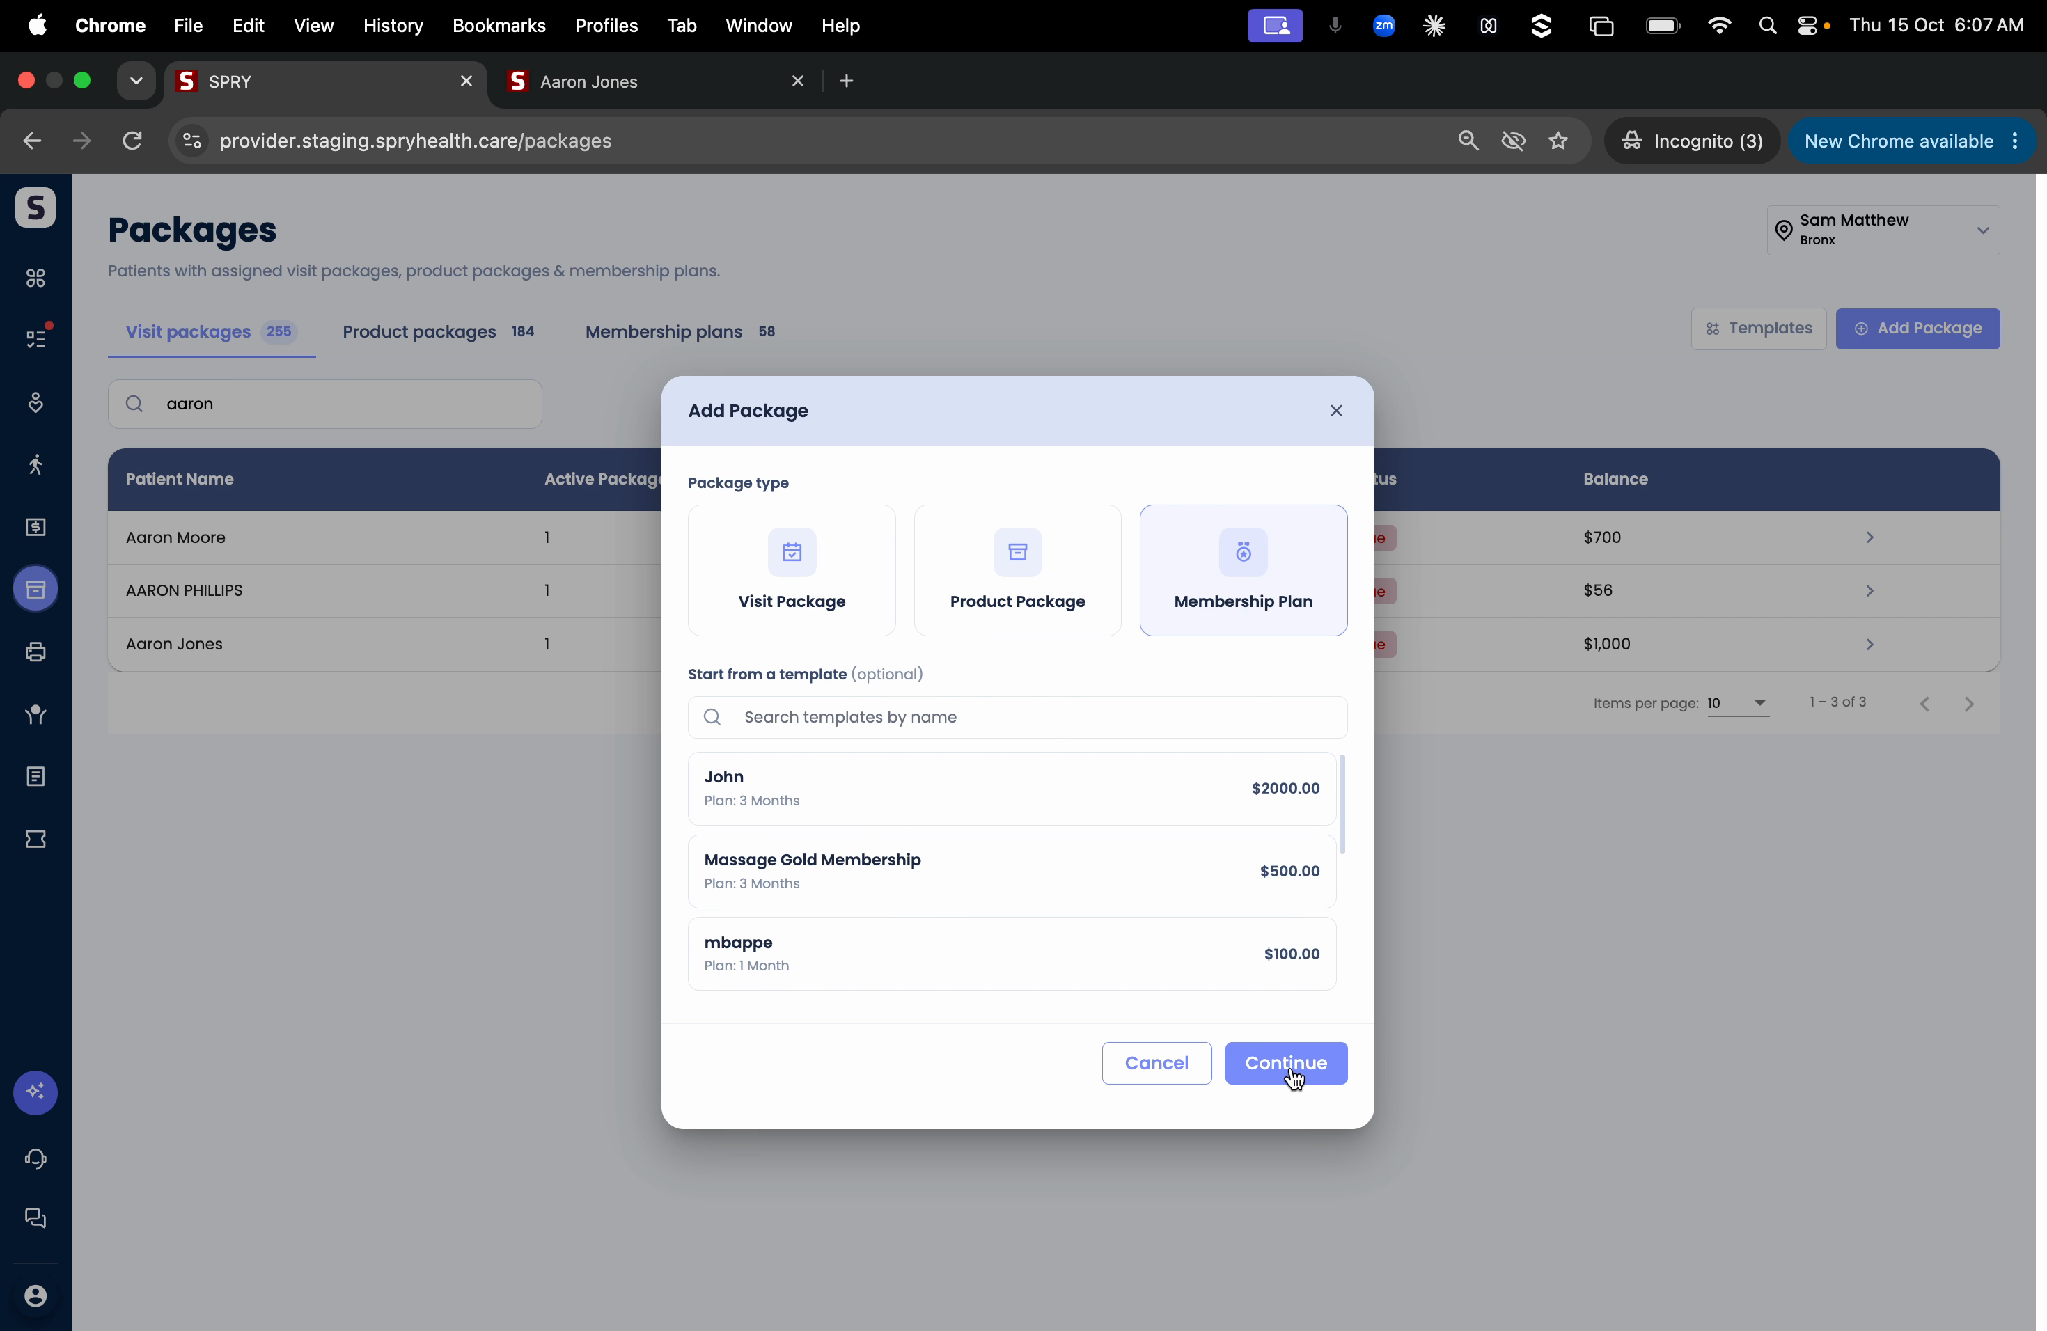
Step 1: Click New Package and select the Membership Plan option.
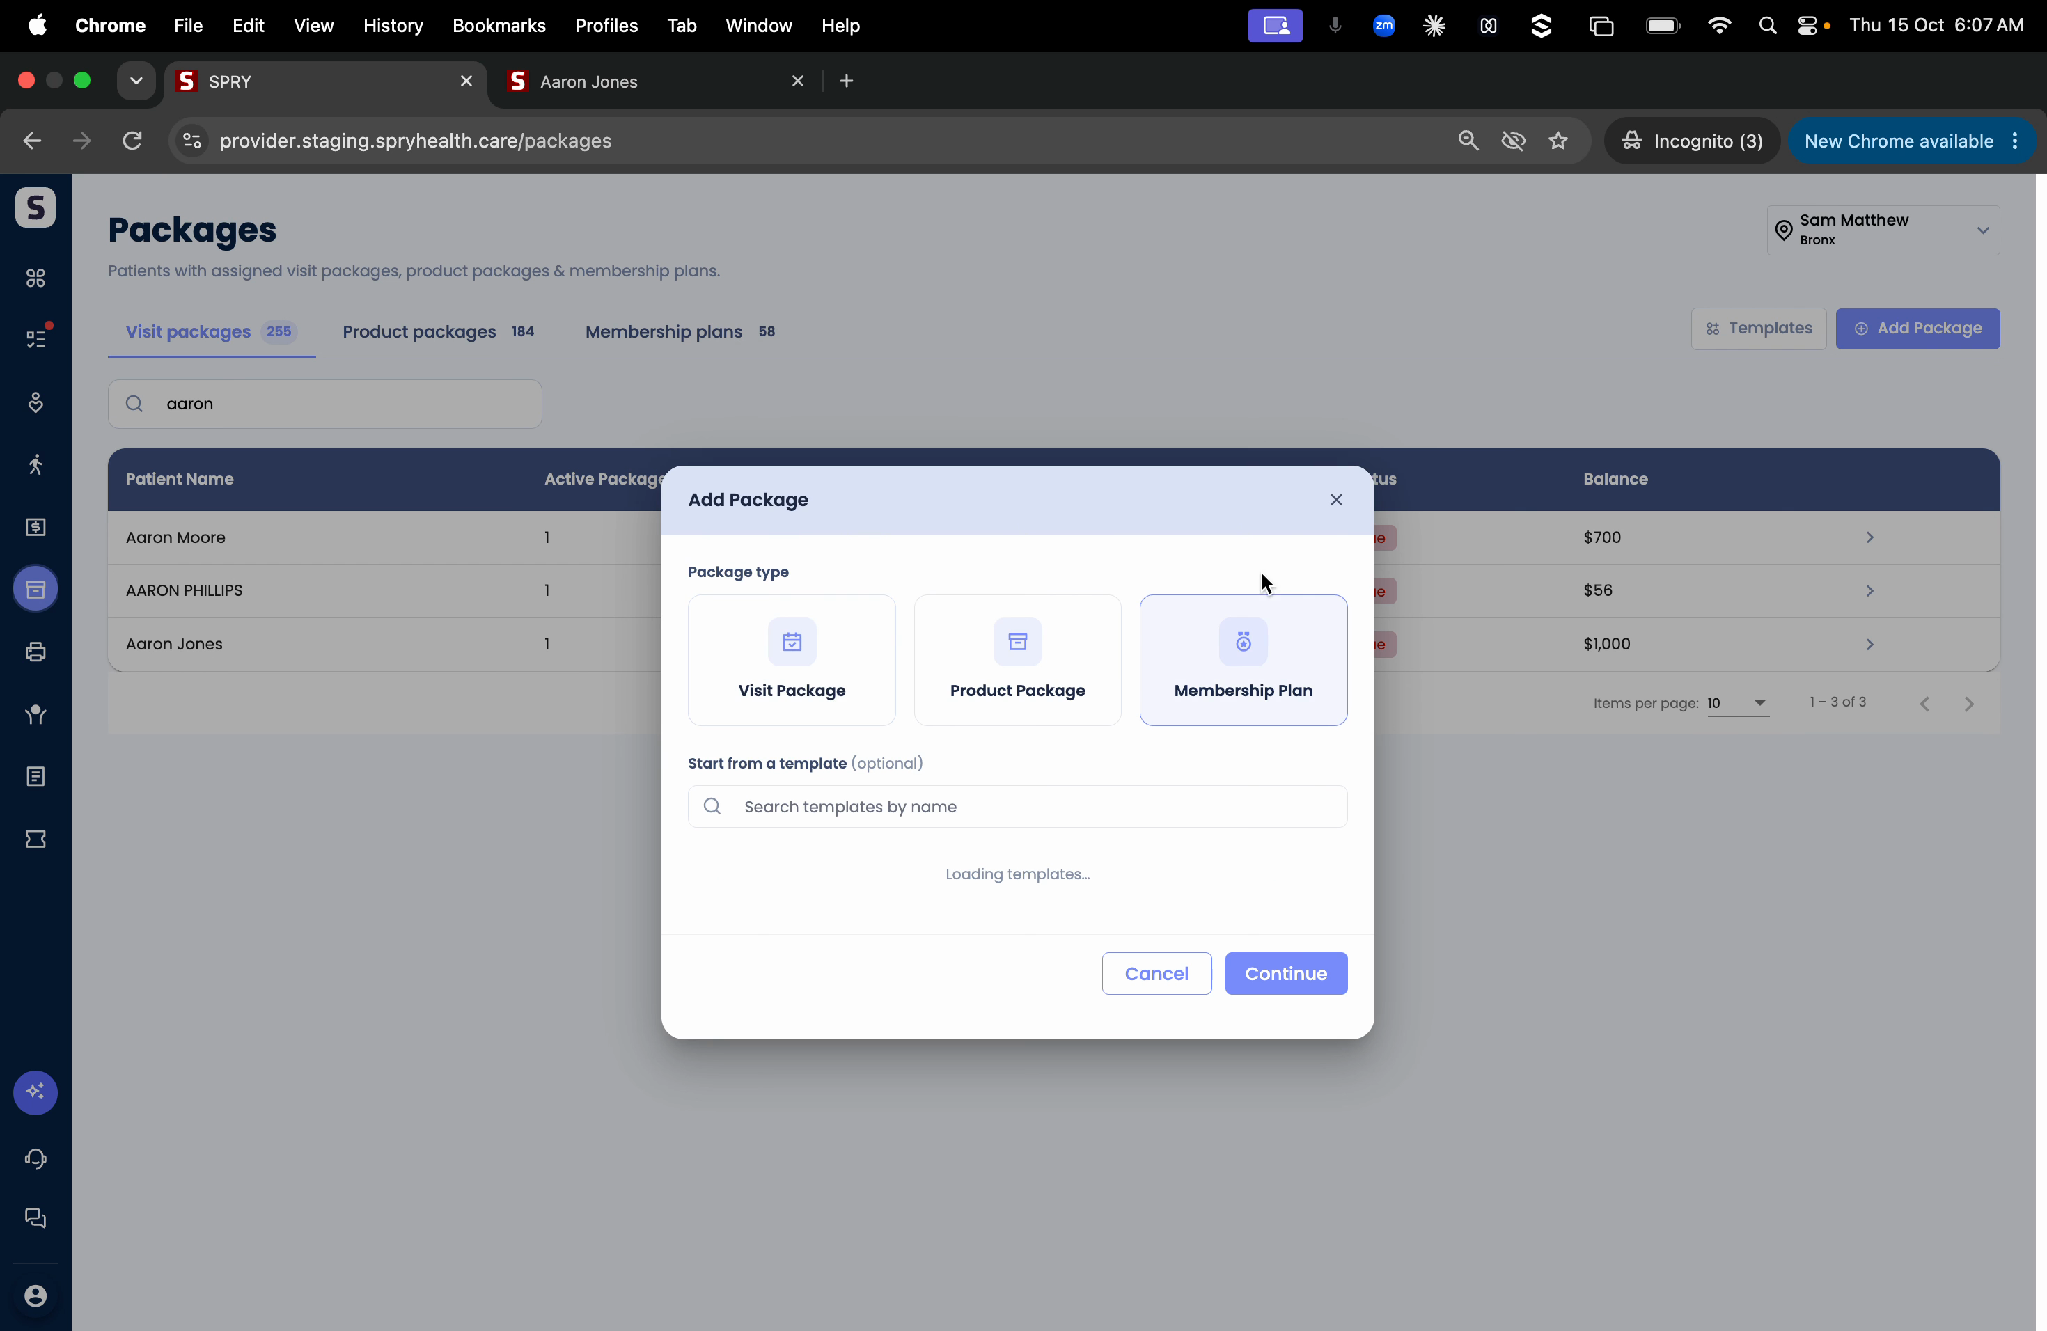
Step 2: Either pick from your saved membership templates or choose Create Custom Membership Package for a tailored solution.
Step 3: Enter the membership name, select the patient, and set the package’s start date—it can be today or any future date.
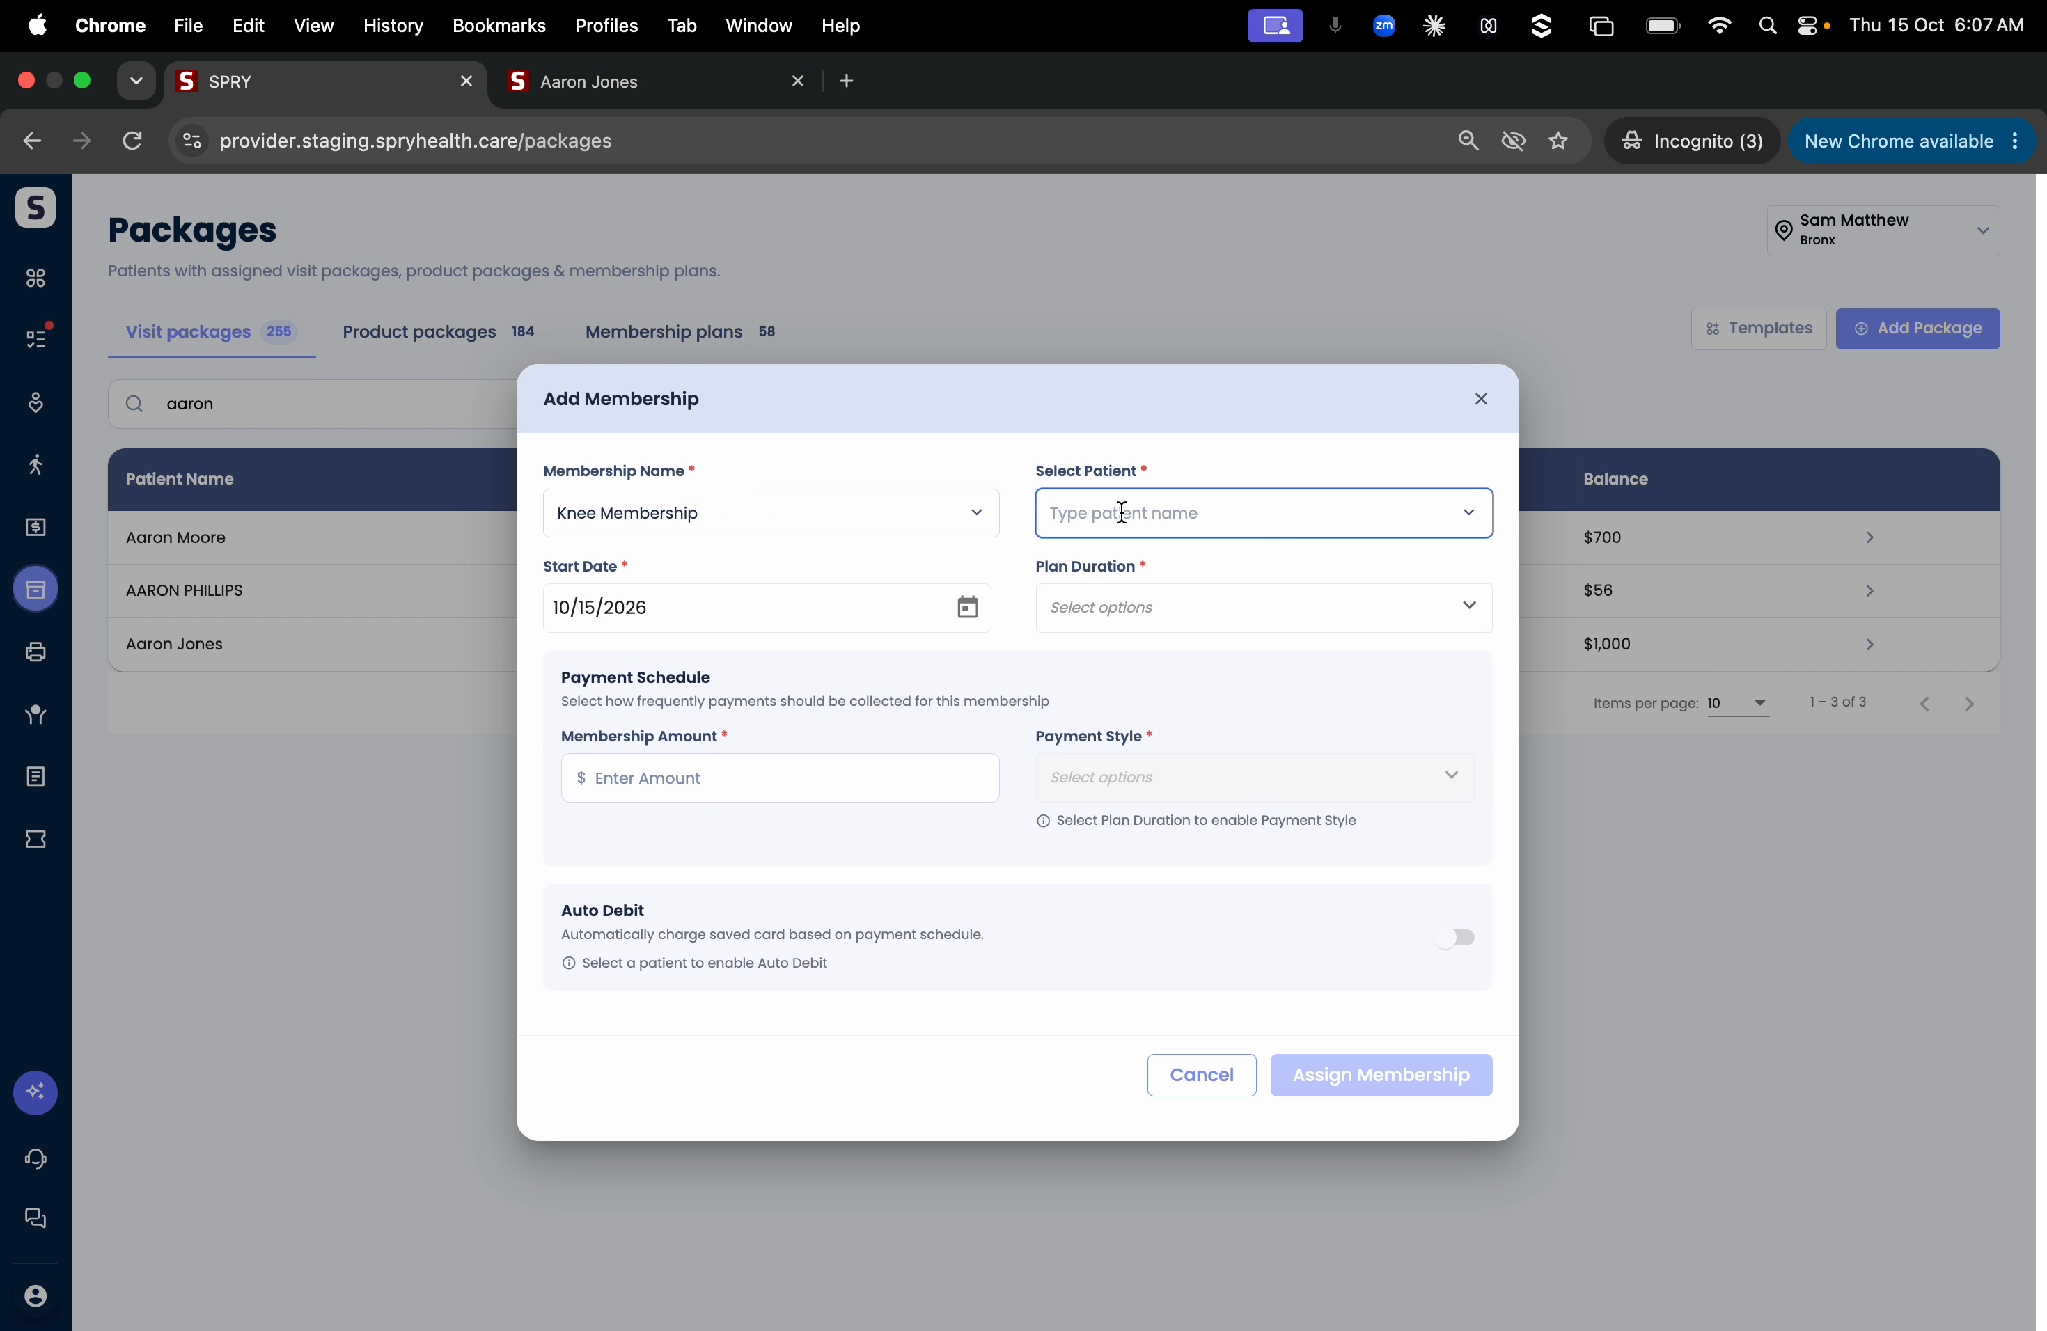
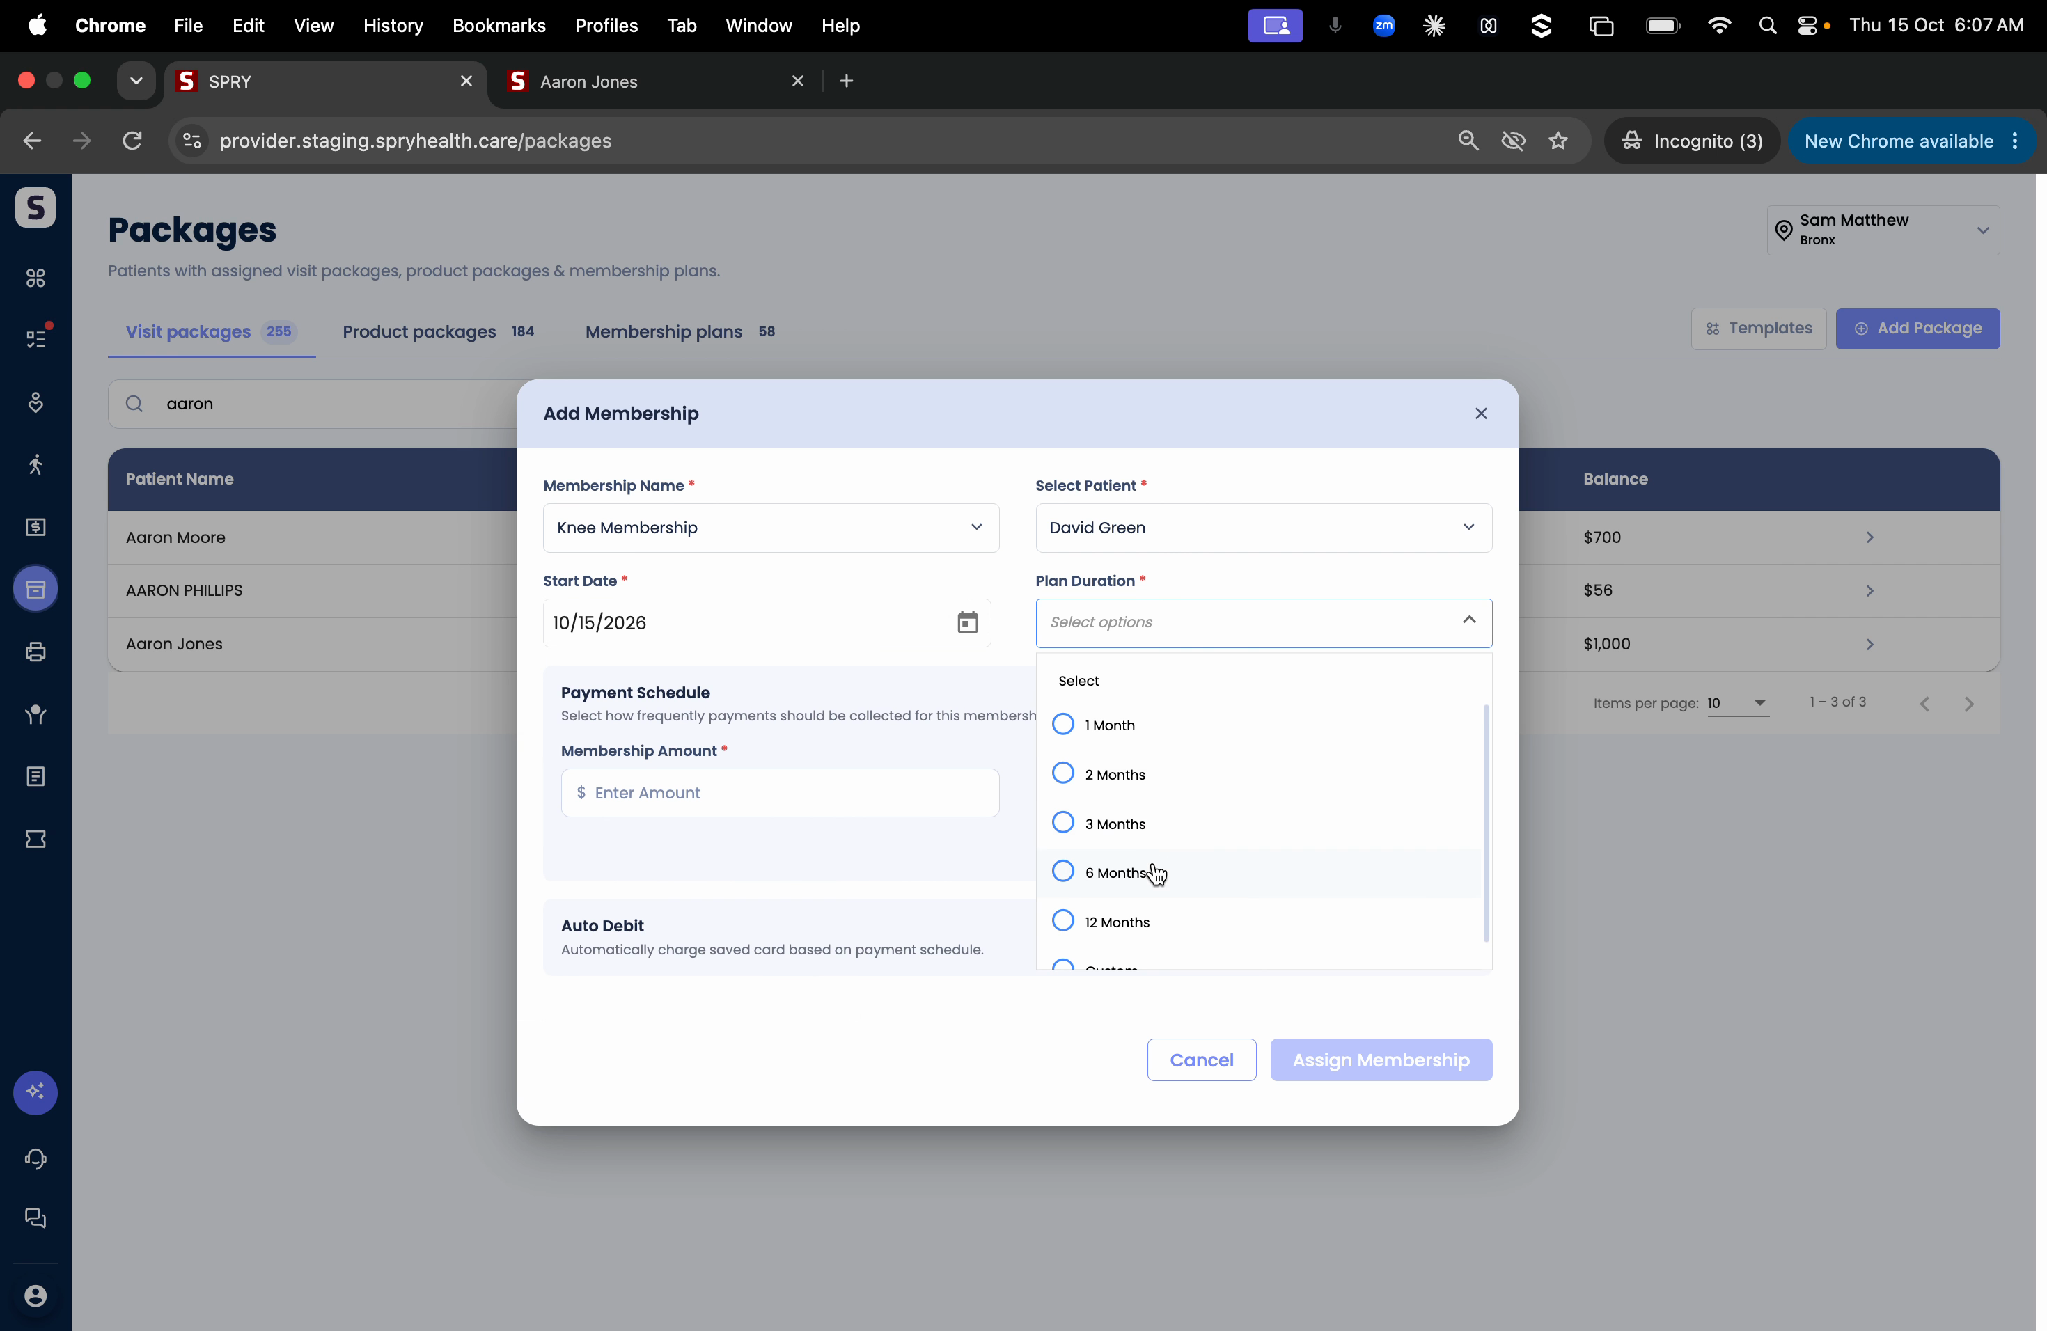
Step 4: Choose the plan duration (e.g., 1, 3, 6, or 12 months) or set a custom length.
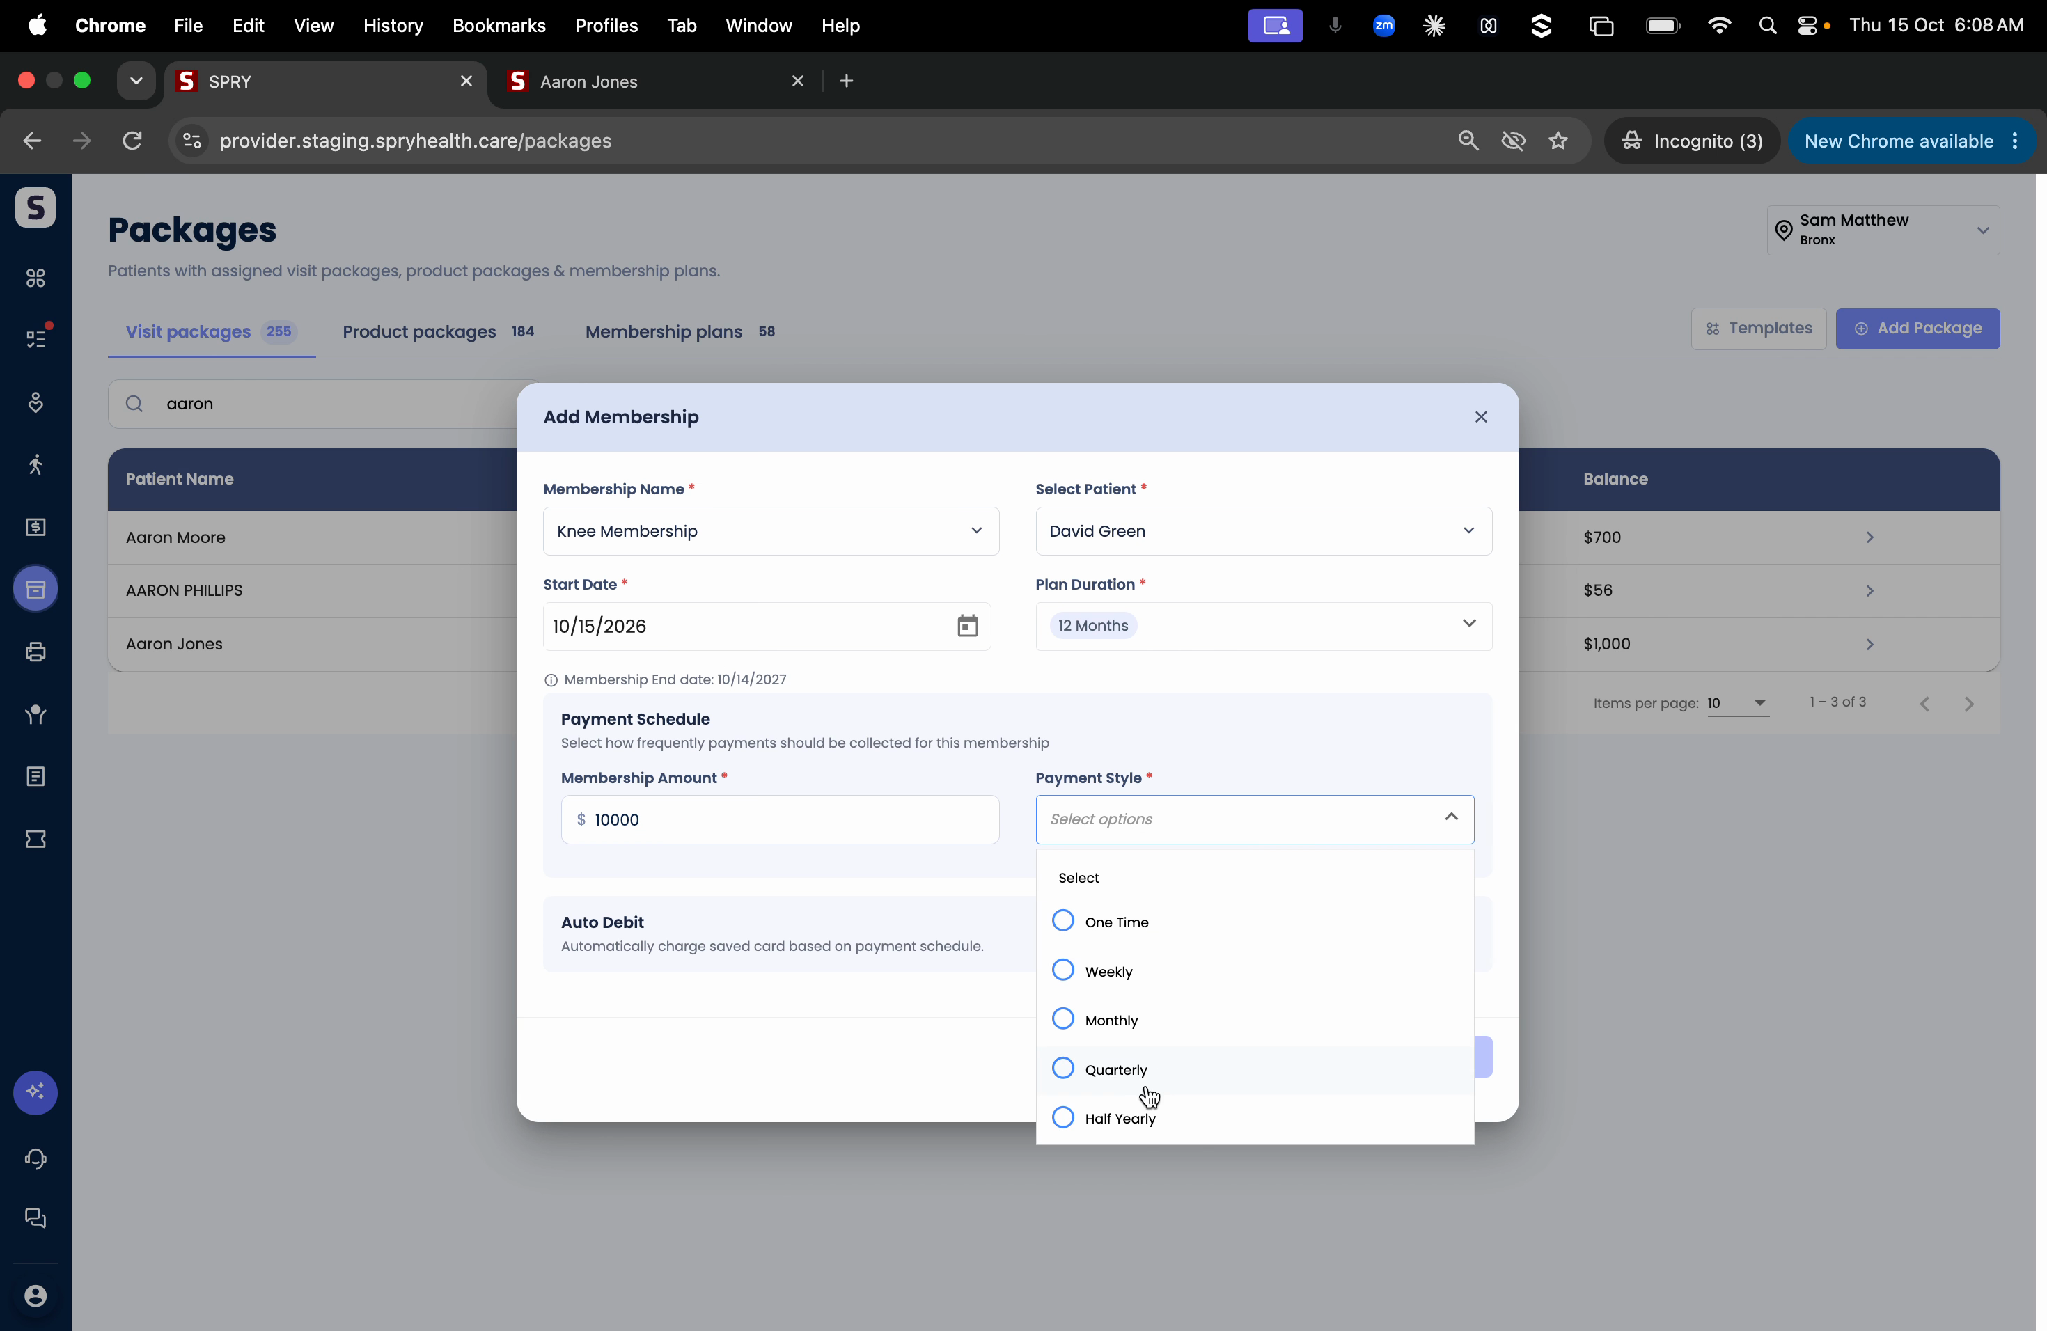
Step 5: Enter the total membership amount and select how payments will be made—one-time, monthly, quarterly, or half-yearly.
Step 6: Enable Auto Debit if you want automatic payments. SPRY will use any saved card on file, or you can add a new one directly.
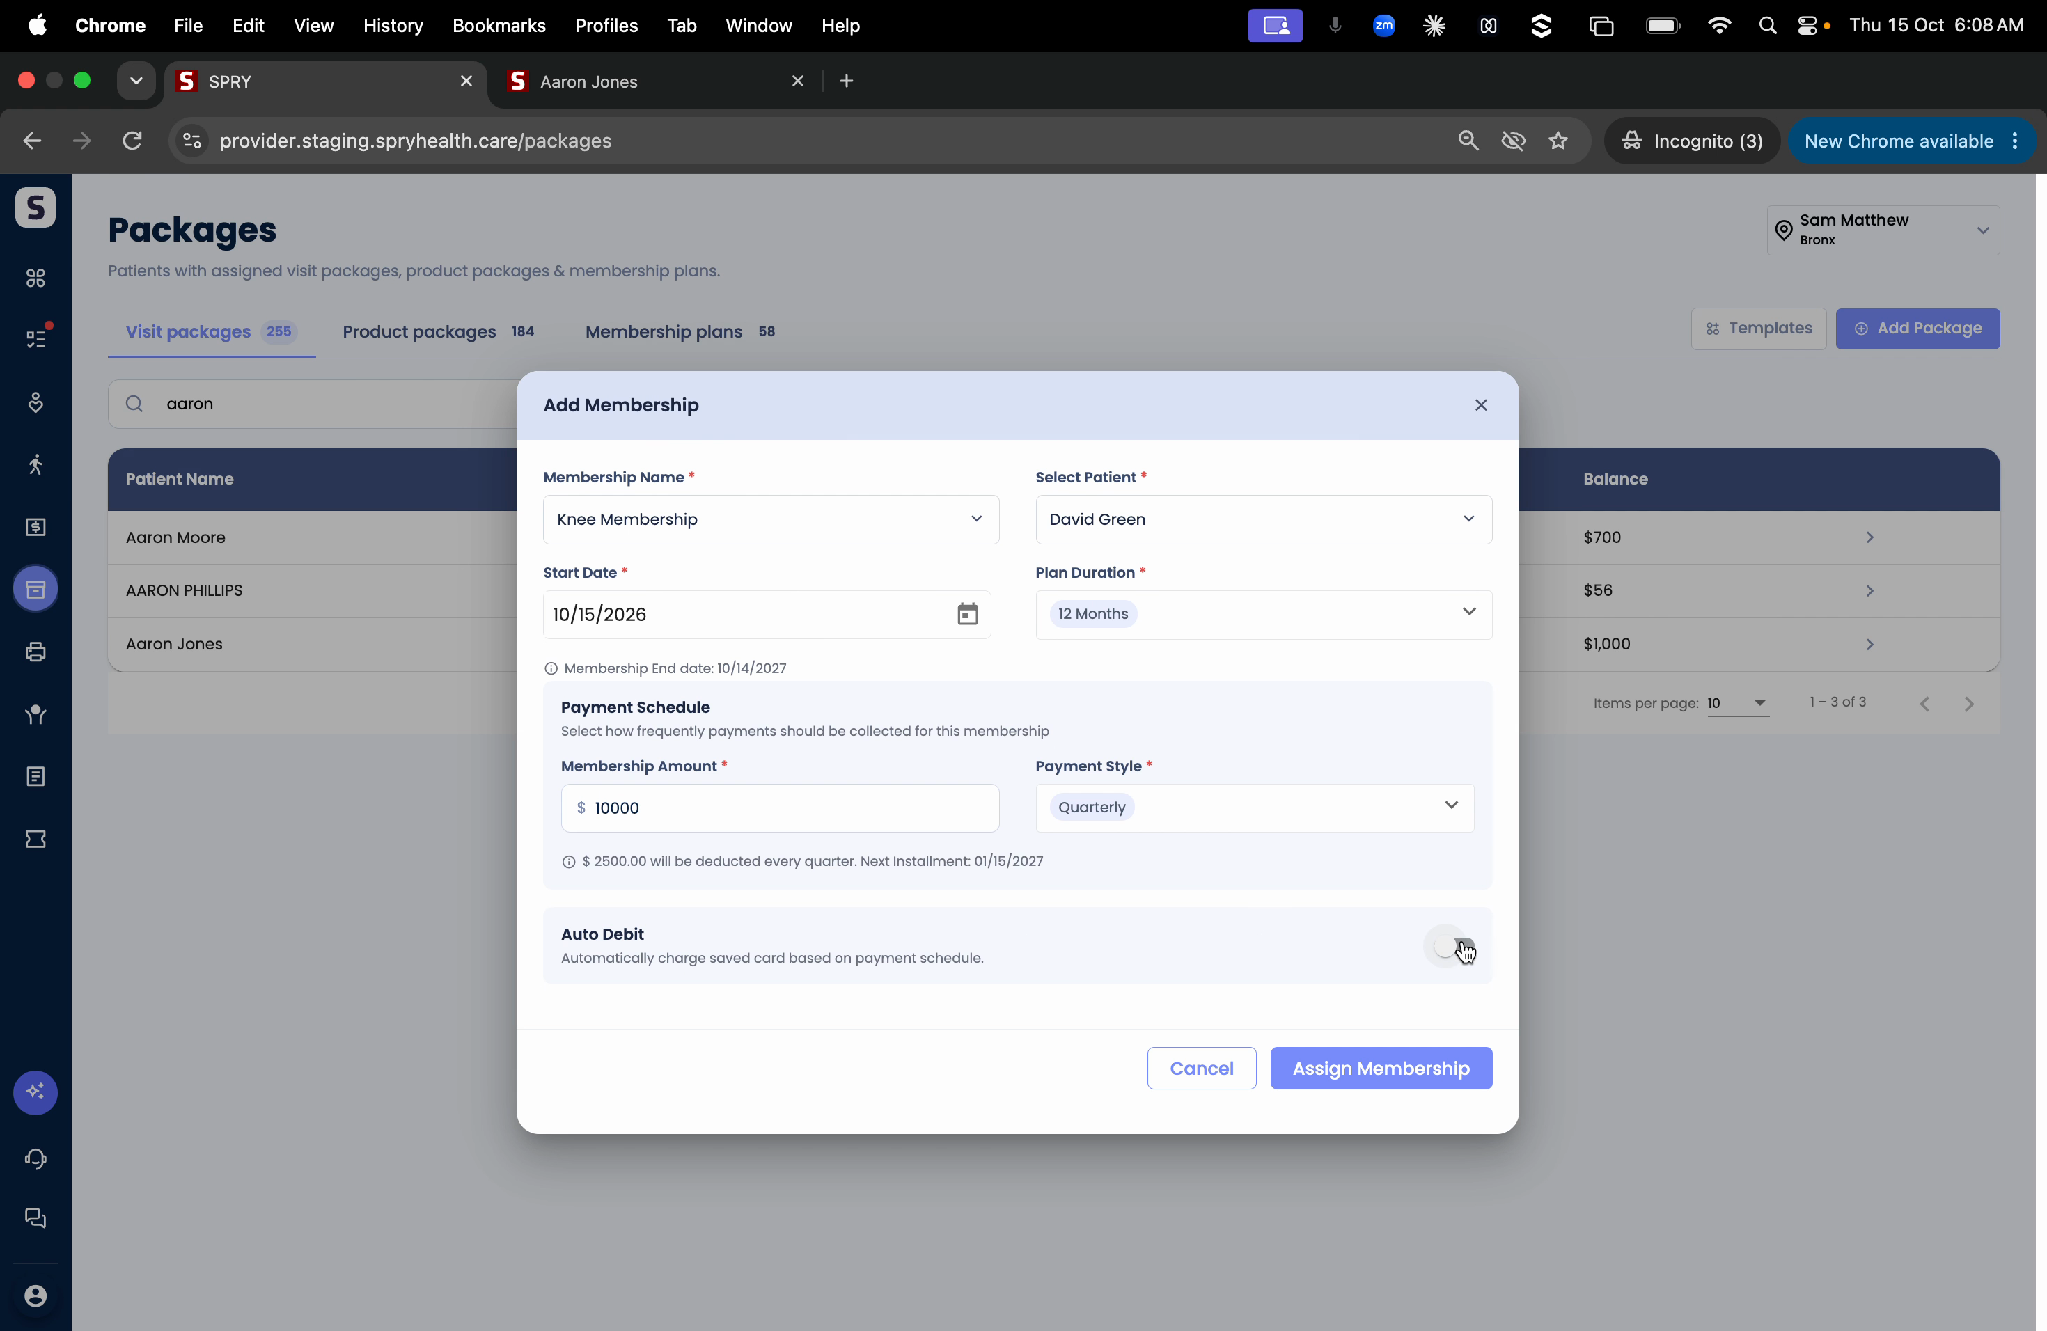
Step 7: Assign the membership. The plan and its details immediately appear on the membership overview screen, including value, due status, and outstanding balance.
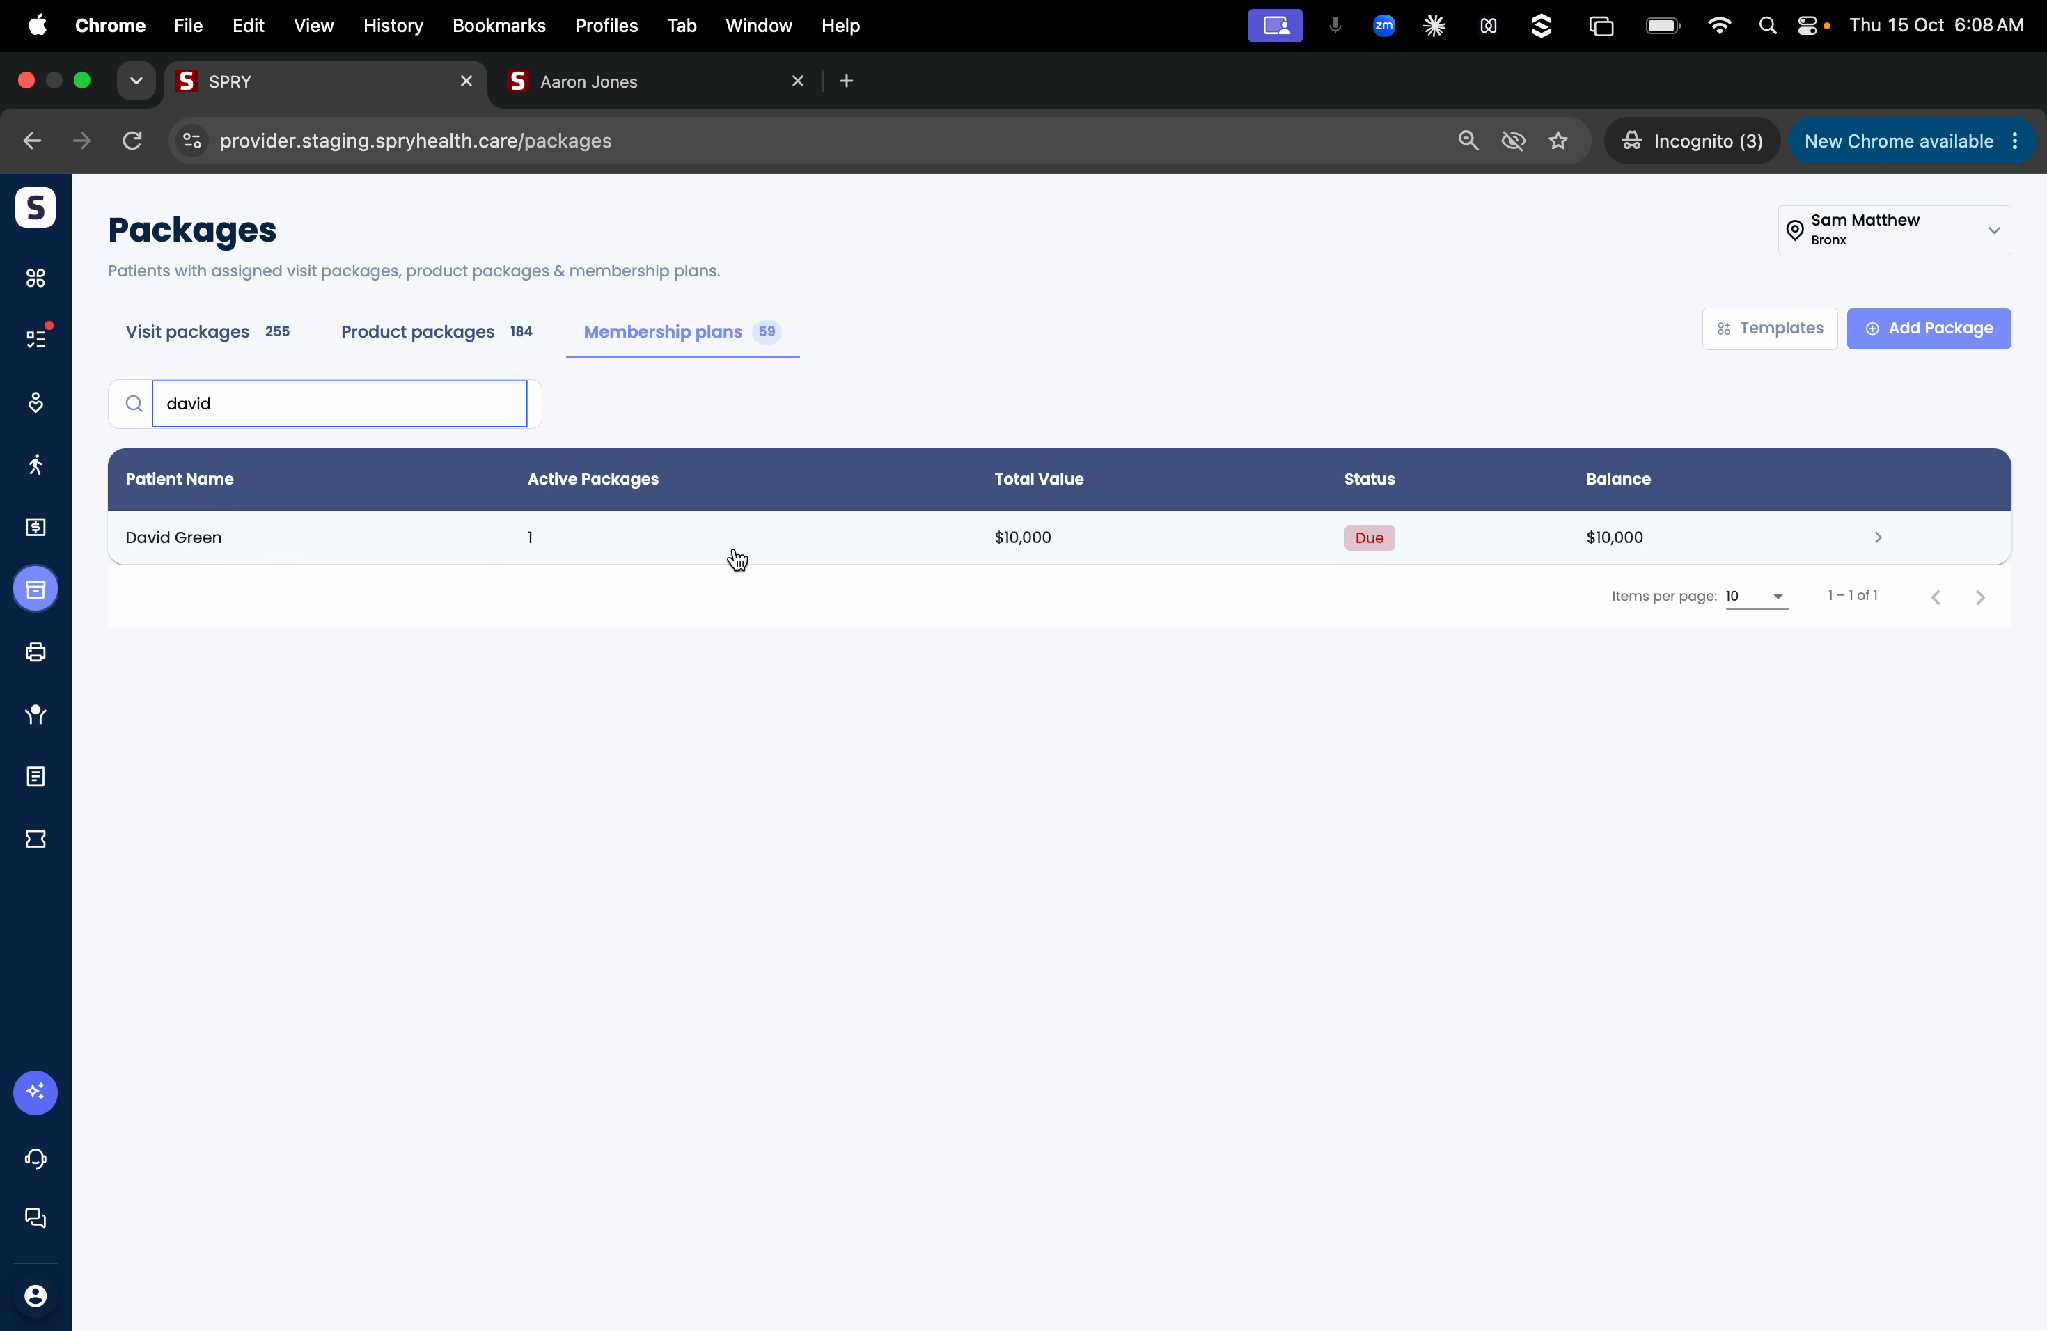
Step 8: Drill into a patient’s membership on their timeline to see status and payment details. Collect payments directly from here whenever needed.
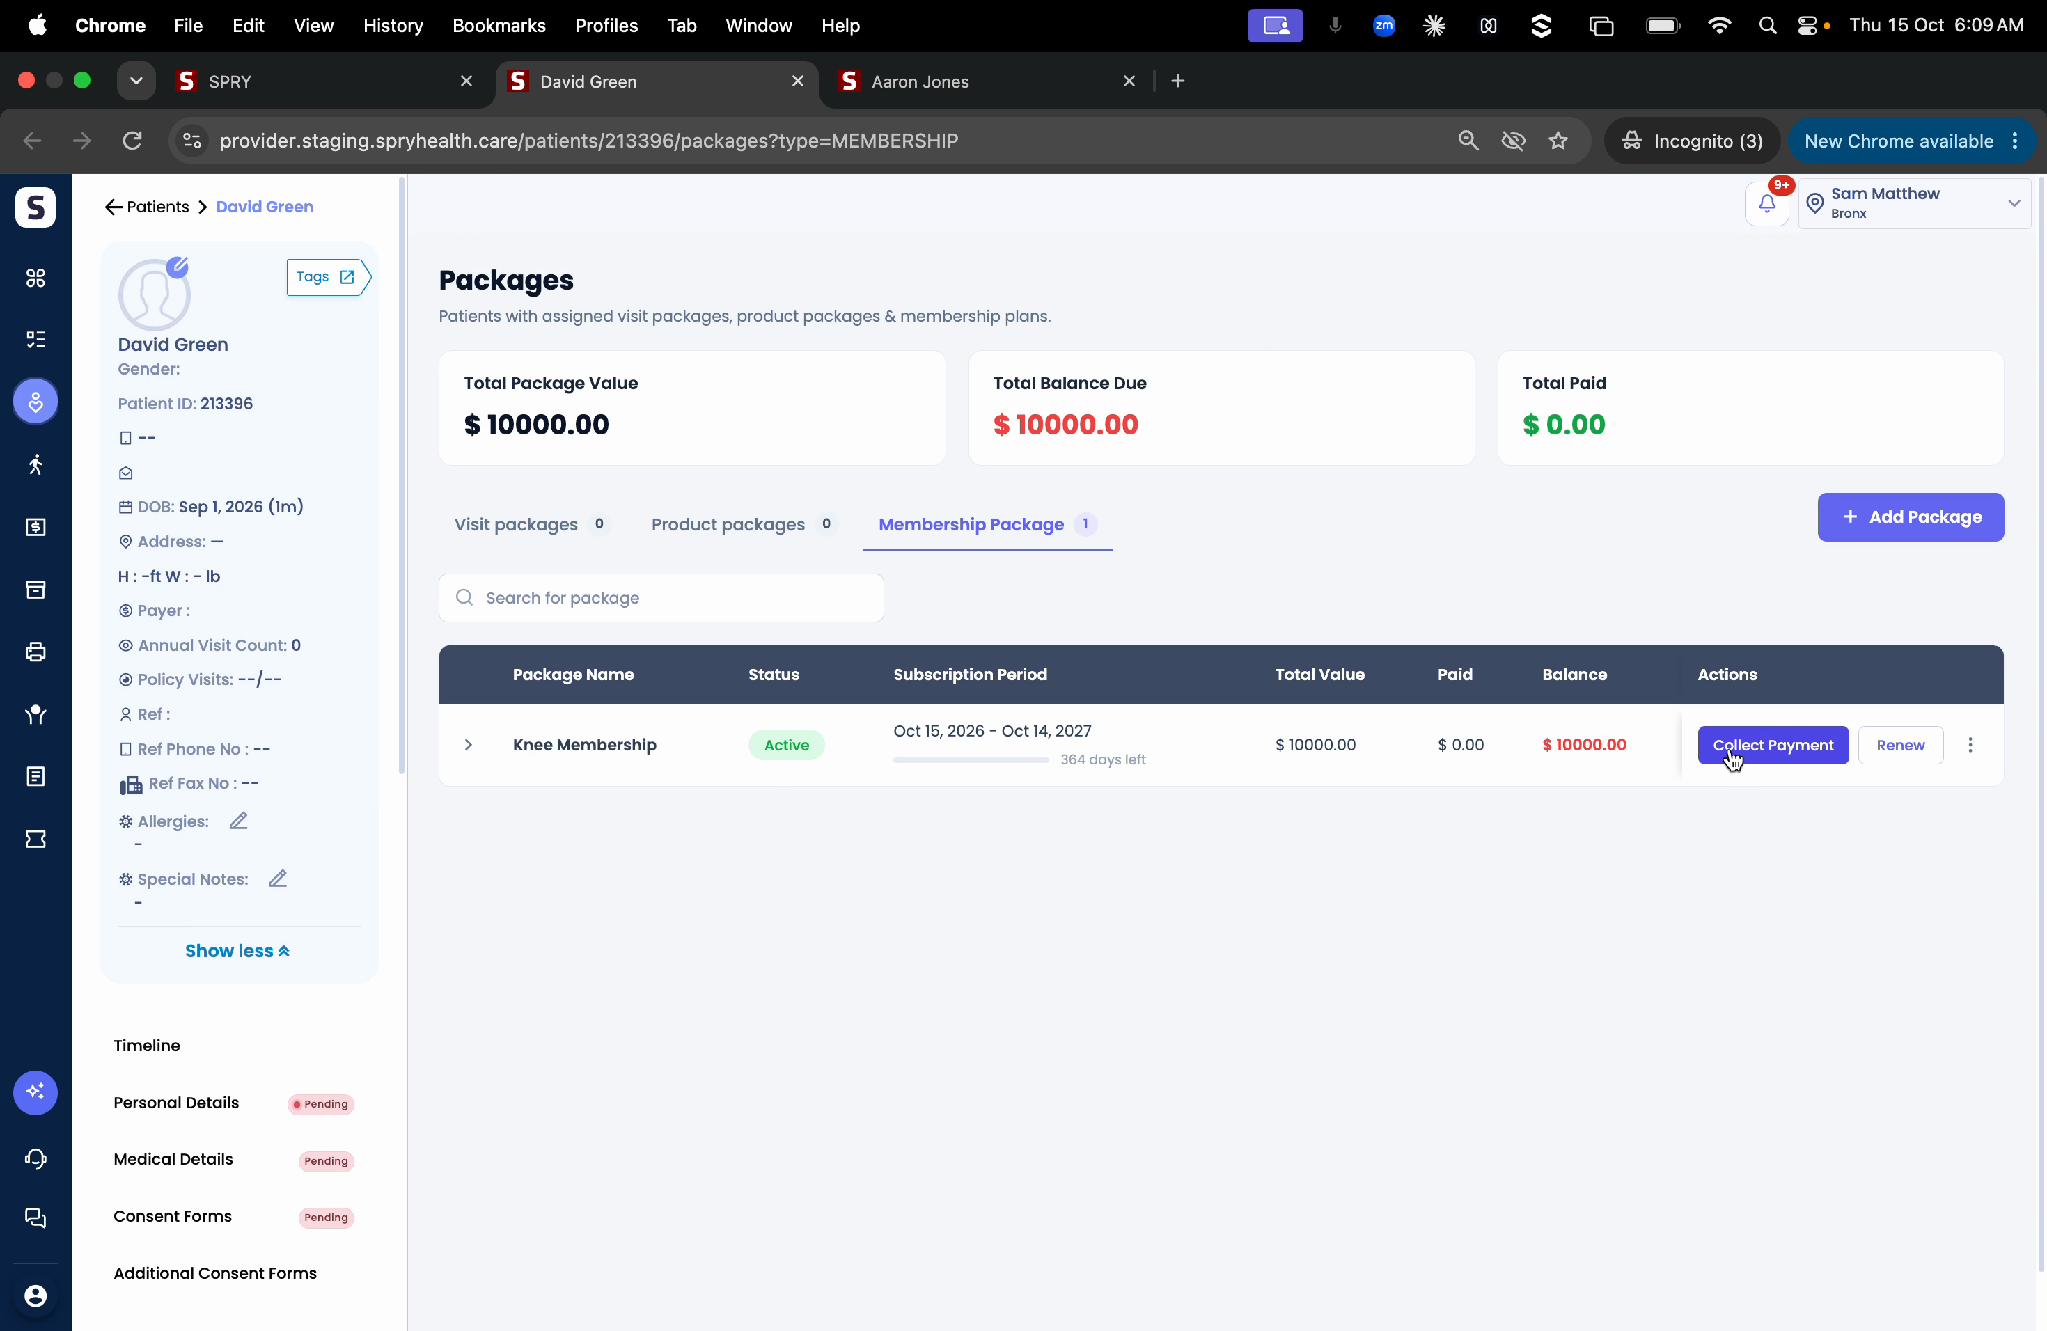
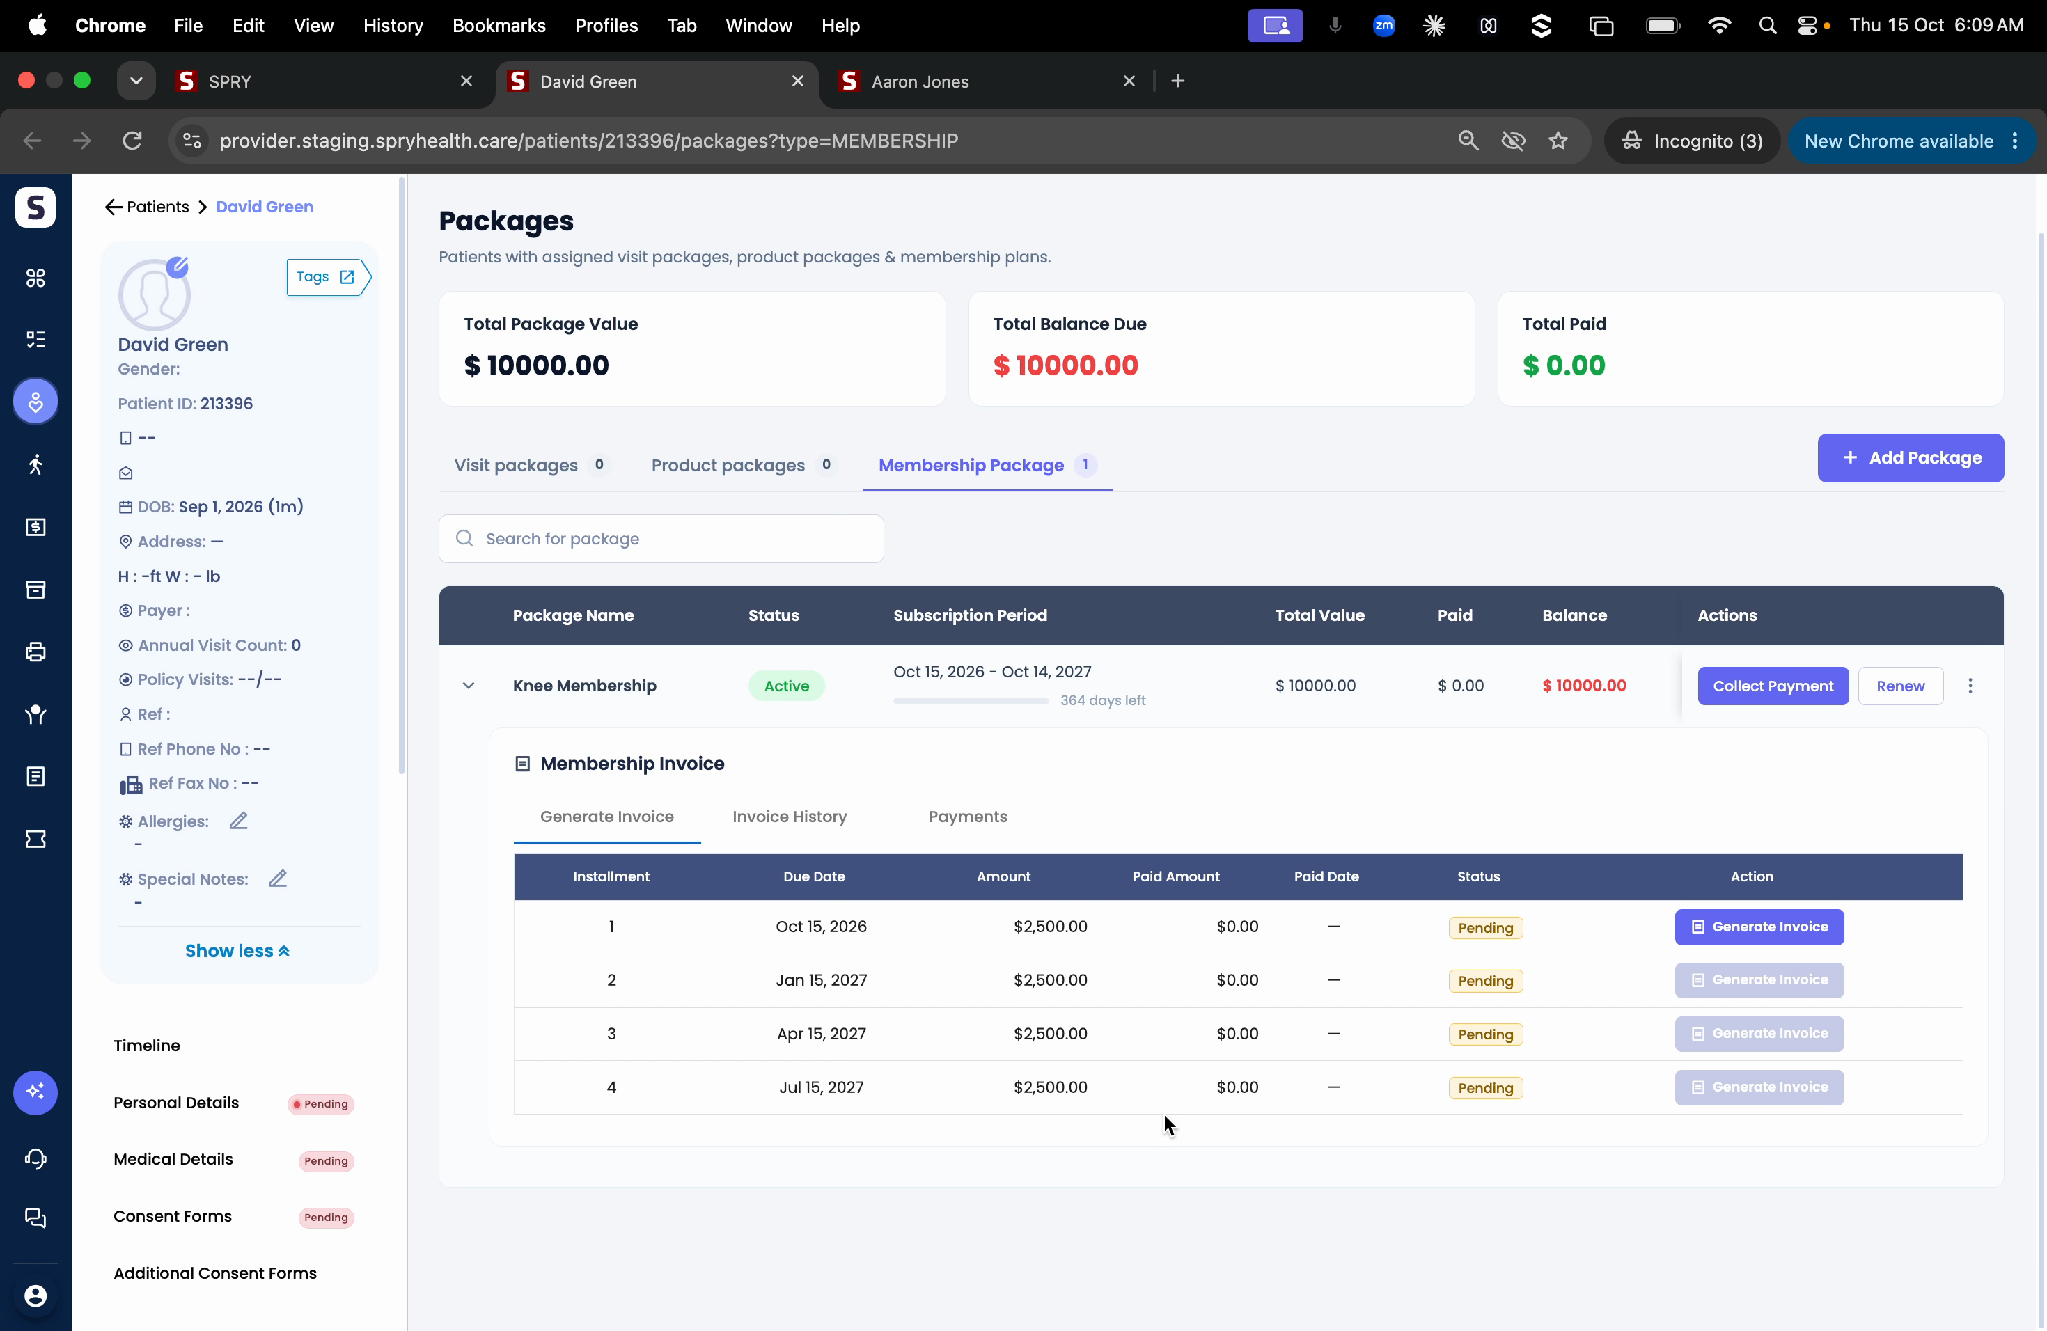
Step 9: For multi-period plans (like quarterly), see a breakdown for each period—review, invoice, and send installments as needed.
Tracking Memberships in the Task Dashboard
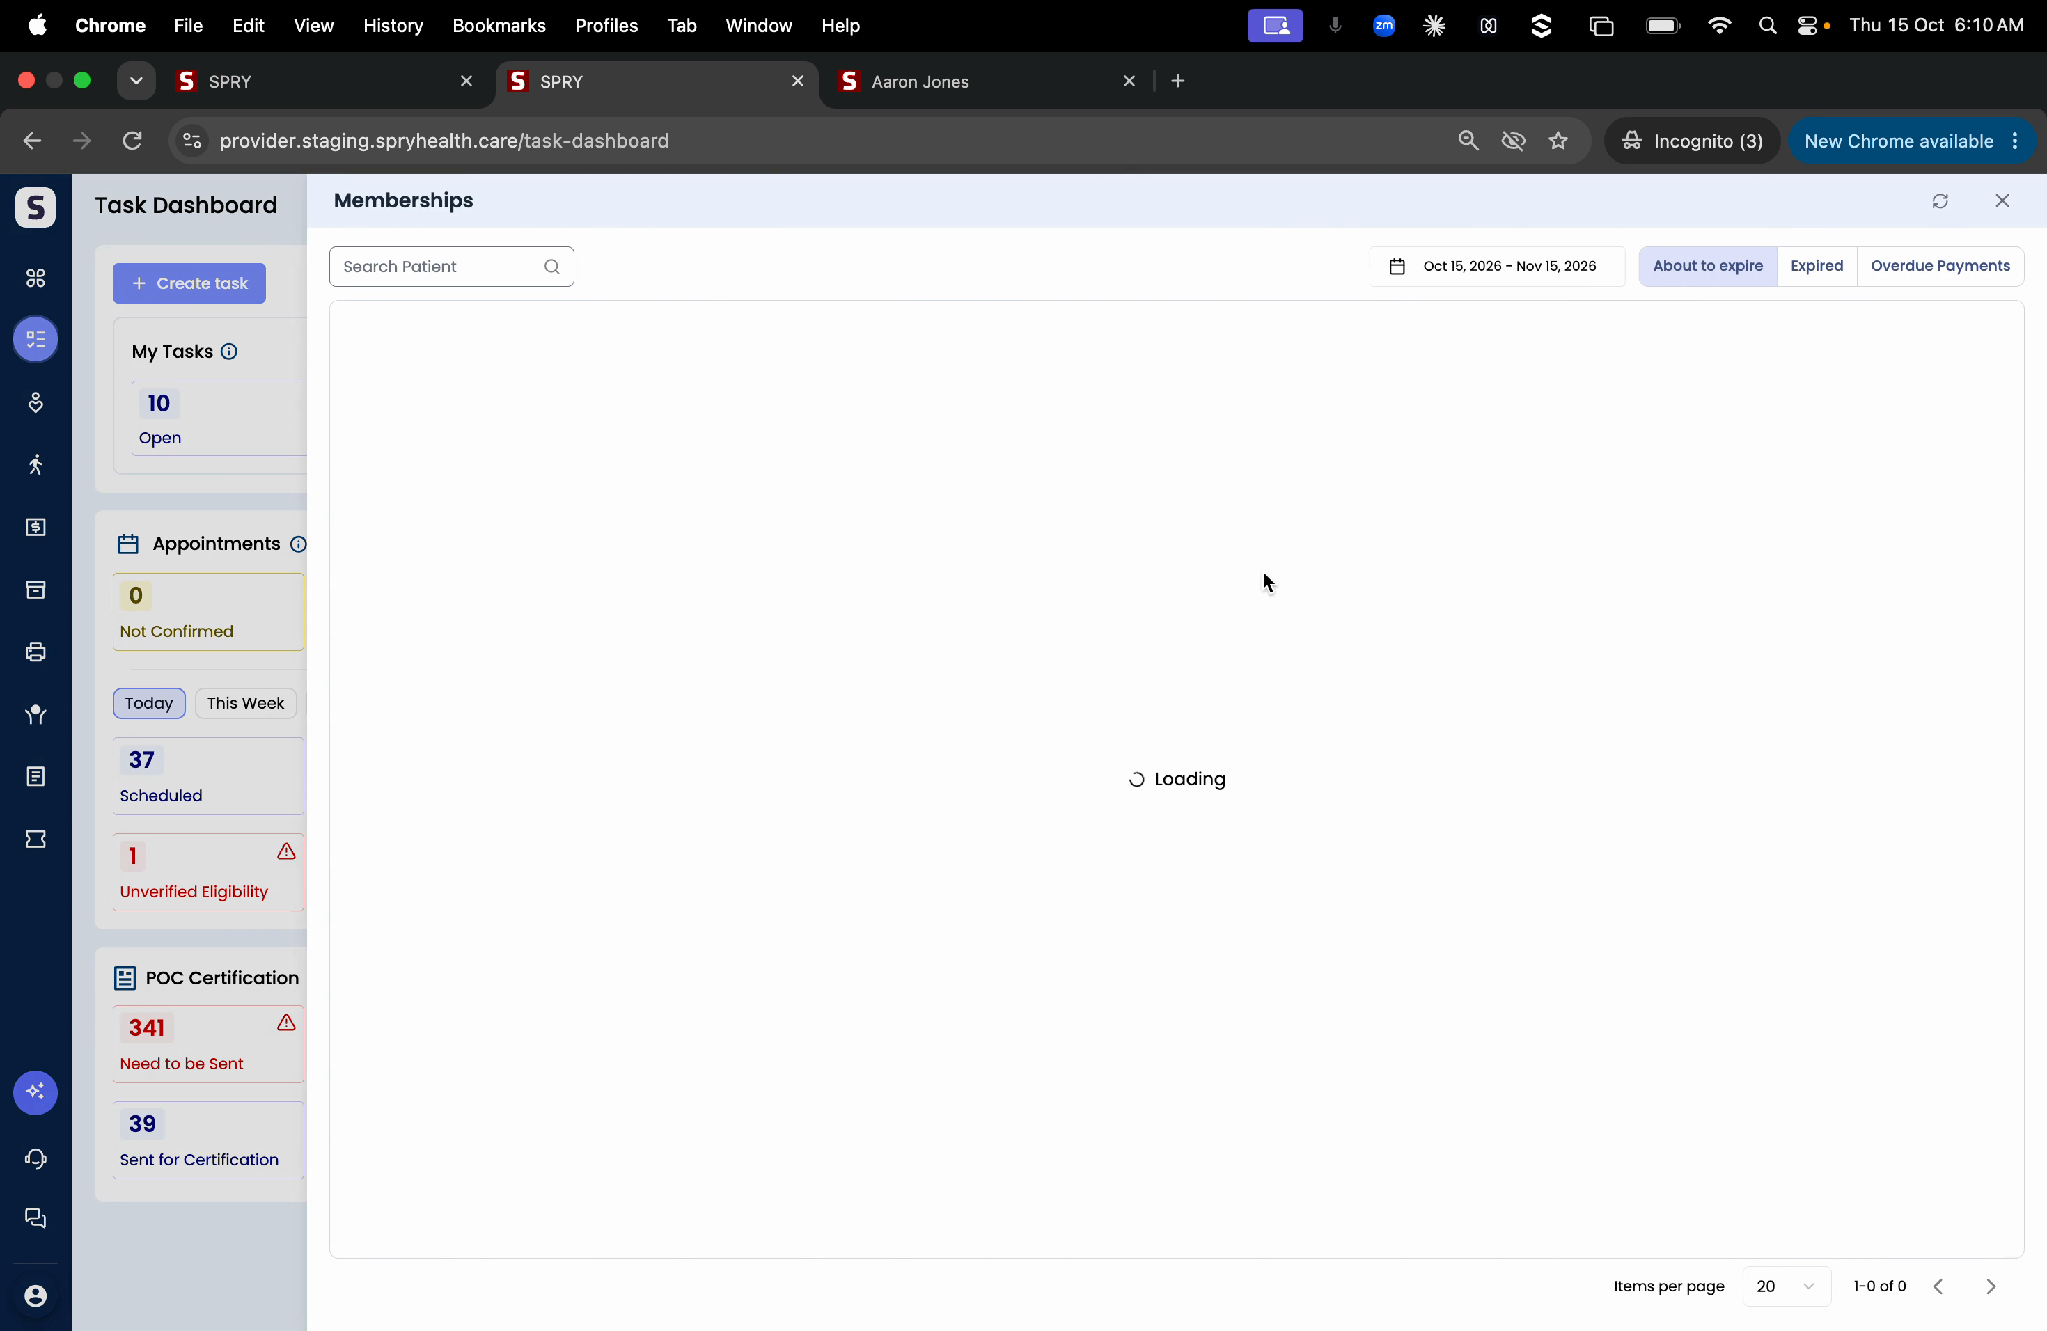
Step 1: Visit the Task Dashboard and check the new Membership section. SPRY highlights memberships about to expire, those already expired, and any overdue payments.
Step 2: Review lists of at-risk or overdue memberships, contact patients for renewal, or address outstanding payments—all from the dashboard.
Conclusion
SPRY updated Packages and Memberships flow streamlines how you assign, bill, and track visit, product, and membership packages. With templates, centralized payment collection, and clear dashboards, managing patient plans is easier than ever. Check overdue or soon-to-expire memberships right from your task dashboard, keeping your practice proactive and your patients engaged.